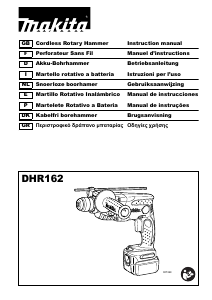
Εγχειρίδιο Makita HR2010 Περιστροφικό σφυρί

Χρειάζεστε ένα εγχειρίδιο για το Makita HR2010 Περιστροφικό σφυρί σας; Παρακάτω μπορείτε να δείτε και να κατεβάσετε το εγχειρίδιο PDF δωρεάν στα Αγγλικά. Αυτό το προϊόν έχει αυτήν τη στιγμή 4 συχνές ερωτήσεις, 0 σχόλια και 0 ψήφους. Εάν αυτό δεν είναι το εγχειρίδιο που θέλετε, επικοινωνήστε μαζί μας.

Είναι ελαττωματικό το προϊόν σας και το εγχειρίδιο δεν προσφέρει λύση; Πηγαίνετε σε ένα Repair Café για δωρεάν υπηρεσίες επισκευής.

Εγχειρίδιο

Loading…

5
FUNCTIONAL DESCRIPTION
CAUTION:
Always be sure that the tool is switched off and
unplugged before adjusting or checking function on the
tool.
Switch action (Fig.1)
CAUTION:
• Before plugging in the tool, always check to see that
the switch trigger actuates properly and returns to the
“OFF” position when released.
Do not tape, tie or otherwise secure the trigger in the
“ON” position.
To start the tool, simply pull the switch trigger. Tool speed
is increased by increasing pressure on the switch trigger.
Release the trigger to stop.
Torque limiter
The torque limiter will actuate when a certain torque level
is reached. The motor will disengage from the output
shaft. When this happens, the bit will stop turning.
CAUTION:
• As soon as the torque limiter actuates, switch off the
tool immediately. This will help prevent premature wear
of the tool.
Hole saws, core bits, diamond core bits, etc. cannot be
used with this tool. They tend to pinch or catch easily in
the hole. This will cause the torque limiter to actuate
too frequently.
ASSEMBLY
CAUTION:
Always be sure that the tool is switched off and
unplugged before carrying out any work on the tool.
Side grip (auxiliary handle) (Fig. 2)
The side grip swings around to either side, allowing easy
handling of the tool in any position. Loosen the side grip
by turning it counterclockwise, swing it to the desired
position and then tighten it by turning clockwise.
Bit grease
Coat the bit shank head beforehand with a small amount
of bit grease (about 0.5 – 1 g).
This chuck lubrication assures smooth action and longer
service life.
Installing or removing the bit (Fig. 3 & 4)
Clean the bit shank and apply bit grease before installing
the bit.
Insert the bit into the tool. Turn the bit and push it in until
it engages.
If the bit cannot be pushed in, remove the bit. Pull the
chuck cover down a couple of times. Then insert the bit
again. Turn the bit and push it in until it engages.
After installing, always make sure that the bit is securely
held in place by trying to pull it out.
To remove the bit, pull the chuck cover down all the way
and pull the bit out.
Depth gauge (Fig. 5)
The depth gauge is convenient for drilling holes of uni-
form depth. Insert the depth gauge into the hole in the
grip base. Adjust the depth gauge to the desired depth
and then tighten the clamp screw to secure the depth
gauge.
NOTE:
The depth gauge cannot be used at the position where
the depth gauge strikes against the gear housing.
OPERATION
Hammer drilling operation
Position the bit at the desired location for the hole, then
pull the switch trigger. Do not force the tool. Light pres-
sure gives best results. Keep the tool in position and pre-
vent it from slipping away from the hole.
Do not apply more pressure when the hole becomes
clogged with chips or particles. Instead, run the tool at an
idle, then remove the bit partially from the hole. By
repeating this several times, the hole will be cleaned out
and normal drilling may be resumed.
CAUTION:
There is a tremendous and sudden twisting force
exerted on the tool/bit at the time of hole break-
through, when the hole becomes clogged with chips
and particles, or when striking reinforcing rods embed-
ded in the concrete. Always use the side grip (auxiliary
handle) and firmly hold the tool by both side grip and
switch handle during operations. Failure to do so may
result in the loss of control of the tool and potentially
severe injury.
Drilling in wood or metal (Fig. 6)
Use the optional drill chuck assembly (consisting of drill
chuck and chuck adapter assembly). When installing it,
refer to “Installing or removing drill bit” described on the
previous page.
You can drill up to 13 mm diameter in metal and up to
24 mm diameter in wood.
MAINTENANCE
CAUTION:
Always be sure that the tool is switched off and
unplugged before attempting to perform inspection or
maintenance.
Never use gasoline, benzine, thinner, alcohol or the
like. Discoloration, deformation or cracks may result.
Replacing carbon brushes (Fig. 7 & 8)
When the resin insulating tip inside the carbon brush is
exposed to contact the commutator, it will automatically
shut off the motor. When this occurs, both carbon
brushes should be replaced. Keep the carbon brushes
clean and free to slip in the holders. Both carbon brushes
should be replaced at the same time. Use only identical
carbon brushes.
Use a screwdriver to remove the brush holder caps. Take
out the worn carbon brushes, insert the new ones and
secure the brush holder caps.
Lubrication (Fig. 9 & 10)
This tool requires no hourly or daily lubrication because it
has a grease-packed lubrication system. Lubricate the
tool every time the carbon brushes are replaced.
Run the tool for several minutes to warm it up. Switch off
and unplug the tool.
Remove the crank cap using a Makita lock nut wrench
(optional accessory). Rest the tool on the table with the
bit end pointing upwards. This will allow the old grease to
collect inside the crank housing.
Λήψη εγχειριδίου στα ελληνικά (PDF, 0.94 MB)
(Σκεφτείτε το περιβάλλον και εκτυπώστε αυτό το εγχειρίδιο μόνο εάν είναι πραγματικά απαραίτητο)

Loading…

Βαθμολογία

Πείτε μας τη γνώμη σας για το Makita HR2010 Περιστροφικό σφυρί βαθμολογώντας ένα προϊόν. Θέλετε να μοιραστείτε τις εμπειρίες σας με αυτό το προϊόν ή να θέσετε μια ερώτηση; Αφήστε ένα σχόλιο στο κάτω μέρος της σελίδας.
Είστε ικανοποιημένοι με το Makita HR2010 Περιστροφικό σφυρί?
Ναι Όχι
Γίνε ο πρώτος που θα βαθμολογήσει αυτό το προϊόν
0 ψήφοι

Λάβετε μέρος στη συζήτηση σχετικά με αυτό το προϊόν

Εδώ μπορείτε να μοιραστείτε τη γνώμη σας για το Makita HR2010 Περιστροφικό σφυρί. Εάν έχετε κάποια ερώτηση, διαβάστε πρώτα προσεκτικά το εγχειρίδιο. Το να ζητήσετε ένα εγχειρίδιο μπορεί να γίνει χρησιμοποιώντας τη φόρμα επικοινωνίας μας.

Περισσότερα για αυτό το εγχειρίδιο

Κατανοούμε ότι είναι ωραίο να έχετε ένα χάρτινο εγχειρίδιο για το Makita HR2010 Περιστροφικό σφυρί σας. Μπορείτε πάντα να κατεβάσετε το εγχειρίδιο από τον ιστότοπό μας και να το εκτυπώσετε μόνοι σας. Εάν θέλετε να έχετε ένα πρωτότυπο εγχειρίδιο, σας συνιστούμε να επικοινωνήσετε με το Makita. Μπορεί να είναι σε θέση να παρέχουν ένα πρωτότυπο εγχειρίδιο. Αναζητάτε το εγχειρίδιο του Makita HR2010 Περιστροφικό σφυρί σας σε διαφορετική γλώσσα; Επιλέξτε τη γλώσσα που προτιμάτε στην αρχική μας σελίδα και αναζητήστε τον αριθμό μοντέλου για να δείτε αν τον έχουμε διαθέσιμο.

Προδιαγραφές

Μάρκα Makita
Μοντέλο HR2010
Κατηγορία Περιστροφικά σφυριά
Τύπος αρχείου PDF
Μέγεθος αρχείου 0.94 MB

Όλα τα εγχειρίδια για Makita Περιστροφικά σφυριά
Περισσότερα εγχειρίδια του Περιστροφικά σφυριά

Συχνές ερωτήσεις σχετικά με Makita HR2010 Περιστροφικό σφυρί

Η ομάδα υποστήριξής μας αναζητά χρήσιμες πληροφορίες προϊόντος και απαντήσεις σε συχνές ερωτήσεις. Εάν εντοπίσετε ανακρίβεια στις συνήθεις ερωτήσεις μας, ενημερώστε μας χρησιμοποιώντας τη φόρμα επικοινωνίας.

Ποια είναι η διαφορά μεταξύ ενός τρυπανιού κρούσης και ενός περιστροφικού σφυριού; Επαληθεύτηκε

Τα τρυπάνια κρούσης μπορούν να χρησιμοποιηθούν για διάτρηση οπών σε τούβλα και τοίχους κονιάματος. Για διάτρηση οπών σε τοίχους από μπετόν χρειάζεστε περιστροφικό σφυρί.

Αυτό ήταν χρήσιμο (260) Διαβάστε περισσότερα

Τι σημαίνει Joule (J) σε σχέση με περιστροφικά σφυριά; Επαληθεύτηκε

Ο αριθμός Joule είναι μια ένδειξη της ενέργειας κρούσης του περιστροφικού σφυριού. Για να τρυπήσετε κανονικές οπές σε σκυρόδεμα, αρκεί ένα περιστροφικό σφυρί με 2.2J.

Αυτό ήταν χρήσιμο (219) Διαβάστε περισσότερα

Πρέπει να φοράω προστασία ακοής όταν χρησιμοποιώ τρυπάνι; Επαληθεύτηκε

Ναι θα έπρεπε. Παρόλο που η ποσότητα του θορύβου που παράγεται από ένα τρυπάνι μπορεί να ποικίλει μεταξύ εμπορικών σημάτων και μοντέλων, η μακροχρόνια έκθεση σε δυνατό θόρυβο μπορεί να προκαλέσει μόνιμη βλάβη στην ακοή. Γι 'αυτό είναι καλή ιδέα να φοράτε προστατευτική ακοή.

Αυτό ήταν χρήσιμο (138) Διαβάστε περισσότερα

Μπορώ να αποθηκεύσω ηλεκτρικά εργαλεία σε υπόστεγο ή γκαράζ; Επαληθεύτηκε

Γενικά, μπορείτε να αποθηκεύσετε ηλεκτρικά εργαλεία σε ένα υπόστεγο ή γκαράζ, ακόμα κι αν μερικές φορές παγώνει εκεί. Ωστόσο, είναι καλύτερο για τη διάρκεια ζωής του ηλεκτρικού εργαλείου να το αποθηκεύετε σε ξηρό μέρος χωρίς μεγάλες διακυμάνσεις θερμοκρασίας. Σε ένα υπόστεγο ή γκαράζ, οι διαφορές στη θερμοκρασία μπορεί να προκαλέσουν τη δημιουργία συμπύκνωσης, η οποία μπορεί να προκαλέσει σκουριά. Επιπλέον, τα εργαλεία που λειτουργούν με μπαταρίες διαρκούν λιγότερο και δεν φορτίζουν το ίδιο καλά σε πολύ χαμηλές θερμοκρασίες. Για να είστε σίγουροι πώς πρέπει να αποθηκεύεται το ηλεκτρικό εργαλείο σας, διαβάζετε πάντα προσεκτικά το εγχειρίδιο χρήσης.

Αυτό ήταν χρήσιμο (70) Διαβάστε περισσότερα
Εγχειρίδιο Makita HR2010 Περιστροφικό σφυρί

Σχετικά προϊόντα

Σχετικές κατηγορίες

×
Download