A.1.1_5613-18101-222
We, the manufacturer
Shenzhen Rapoo Technology Co., Ltd.
Fax: +86-0755-2858 8555
Declare that the product
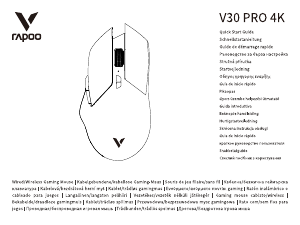
Product Name :Multi-mode Wireless Keyboard & Mouse
Model No :8200T(K8200M+7200M)
Complies with the following norms of :
Kai Guo, Manager
R&D Department Date of Issue: Aug.
30, 2019
Declaration of Conformity
Manufacturer/Authorised representative
EN 62479:2010
EN 50663:2017
EN 60950-1:2006+A11:2009+A1:2010+A12:2011+A2:2013
The product is in compliance with the essential requirements of Radio
Equipment Directive 2014/53/EU,and the RoHS Directive 2011/65/EU.
It is forbidden to reproduce any part of this quick start guide without the permission of Shenzhen Rapoo Technology Co., Ltd.
FCC Statement
This equipment has been tested and found to comply with the limits for a Class B digital device, pursuant to part 15 of the FCC rules. These limits are designed to provide reasonable protection against harmful interference
in a residential installation. This equipment generates, uses and can radiate radio frequency energy and, if not installed and used in accordance with the instructions, may cause harmful interference to radio
communications. However, there is no guarantee that interference will not occur in a particular installation. If this equipment does cause harmful interference
to radio or television reception, which can be determined by turning the equipment off and on, the user is encouraged to try to correct the interference by one or more of the following measures:
-Reorient or relocate the receiving antenna.
-Increase the separation between the equipment and receiver.
-Connect the equipment into an outlet on a circuit different from that to which the receiver is connected.
-Consult the dealer or an experienced radio/TV technician for help.
To assure continued compliance, any changes or modifications not expressly approved by the party responsible for compliance could void the user’s authority to operate this equipment. (Example- use only shielded
interface cables when connecting to computer or peripheral devices).
FCC Radiation Exposure Statement
This equipment complies with FCC RF radiation exposure limits set forth for an uncontrolled environment. This transmitter must not be co-located or operating in conjunction with any other antenna or transmitter.
This equipment complies with Part 15 of the FCC Rules.Operation is subject to the following two conditions:
(1) This device may not cause harmful interference, and
(2) This device must accept any interference received, including interference that may cause undesired operation.
Caution!
The manufacturer is not responsible for any radio or TV interference caused by unauthorized modifications to this equipment. Such modifications could void the user authority to operate the equipment.
ISEDC RSS warning
This device complies with Industry Canada licence-exempt RSS standard (s). Operation is subject to the following two conditions:
(1) this device may not cause interference, and
(2) this device must accept any interference,including interference that may cause undesired operation of the device.
Le présent appareil est conforme aux CNR d'Industrie Canada applicables aux appareils radio exempts de licence.
L'exploitation est autorisée aux deux conditions suivantes:
(1) l'appareil ne doit pas produire de brouillage, et
(2) l'utilisateur de l'appareil doit accepter tout brouillage radioélectrique subi, même si le brouillage est susceptible d'en compromettre le fonctionnement.
ISEDC Radiation Exposure Statement:
This equipment complies with ISEDC RF radiation exposure limits set forth for an uncontrolled environment. This transmitter must not be co-located or operating in conjunction with any other antenna or transmitter.
Cet appareil est conforme aux limitesd'exposition de rayonnement RF ISEDC établiespour un environnement non contrôlé.
Cetémetteur ne doit pas être co-implanté oufonctionner en conjonction avec toute autreantenne ou transmetteur.
Any Changes or modifications not expressly approved by the party responsible for compliance could void the user’s authority to operate the equipment.
Warranty / Garantie / Garantie / Garanzia / Garantía / Garantie / Garantia / Гарантия / Гарантія
EN 300 440 V2.1.1(2017-03)
EN 300 328 V2.1.1(2016-11)
EN 301 489-1 V2.2.0(2017-03)
EN 301 489-3 V2.1.1(2017-03)
EN 301 489-17 V3.2.0(2017-03)
www.rapoo.com
The device is provided with two-year limited hardware warranty from the purchase day. Please see www.rapoo.com for more information.
L'appareil est fourni avec deux ans de garantie matérielle limitée à compter du jour d'achat. Merci de consulter www.rapoo.com pour plus d'informations.
Wir gewähren eine zweijährige, eingeschränkte Hardware-Garantie ab Kaufdatum. Weitere Informationen finden Sie hier: www.rapoo.com.
il dispositivo viene fornito con due anni di garanzia hardware limitata a parite dalla data di acquisto. Per ulteriori informazioni consultare www.rapoo.com.
El dispositivo se proporciona con una garantía de hardware limitada de dos años a partir de la fecha de compra. Consulte la dirección www.rapoo.com para obtener más información.
Het toestel wordt met een tweejarige beperkte hardware-garantie vanaf de aankoopdatum geleverd. Raadpleeg www.rapoo.com voor meer informatie.
O dispositivo é fornecido com garantia de hardware limitada de dois anos a partir do dia da compra. Por favor consulte www.rapoo.com para obter mais informações.
Данное устройство предоставляется с ограниченной гарантией на аппаратное обеспечение сроком два года со дня покупки. Более подробную информацию можно найти по адресу www.rapoo.com.
Строк дії обмеженої гарантії для апаратного забезпечення - два роки з дати придбання. Більше інформації ви знайдете на www.rapoo.com.
Bluetooth mode/Mode Bluetooth/Bluetooth-Modus/Modalità Bluetooth/Modo Bluetooth/
Bluetooth-modus/Modo Bluetooth/Режим Bluetooth/Режим Bluetooth
Teclado
1. Mantenha premidas as combinações de teclas, Fn+1, Fn+2 ou Fn+3 durante
pelo menos 3 segundos para ,Os LED de estado picam lentamente, O teclado
poderá ser detetado durante 60 segundos,emparelhar 3 dispositivos diferentes
através de Bluetooth.
2. Conclua o emparelhamento Bluetooth no seu dispositivo.
Rato
1. Ligue o rato.
2. Pressione o botão de Bluetooth para selecionar o canal ao qual o seu
dispositivo está ligado. Os LED de estado verde e azul piscam rapidamente.
3. Mantenha pressionado o botão de Bluetooth durante pelo menos três
segundos para emparelhar. Os LED de estado verde e azul piscam lentamente. O
rato estará detetável durante 2 minutos.
4. Conclua o emparelhamento Bluetooth no seu dispositivo. Quando o rato e o
seu dispositivo estiverem emparelhados, a luz irá apagar.
Emparelhamento Bluetooth
Windows®7 e 8:
1. Clique no botão "Iniciar" e, em seguida, selecione Painel de Controlo >
Adicionar um dispositivo
2. Selecione o teclado ou o rato na lista.*
3. Clique em Seguinte e siga as instruções que possam ser apresentadas no ecrã.
Windows®10:
1. Clique no botão "Iniciar" e, em seguida, selecione Definições > Dispositivos >
Bluetooth.
2. Selecione o teclado ou o rato na lista.*
3. Clique em Emparelhar e siga as instruções que possam ser apresentadas no
ecrã.
*RAPOO BT3.0 KB/RAPOO BLE KB/Rapoo BleMouse/RAPOO BT3.0 Mouse
Клавиатура
1. Нажмите и удерживайте кнопки Fn+1, Fn+2 или Fn+3 не менее 3 секунд, C
ветодиоды состояния мигают медленно. Клавиатура обнаруживается в
течение 60 секунд,чтобы выполнить сопряжение 3 различных устройств по
Bluetooth.
2. Выполните на своем устройстве сопряжение по Bluetooth.
Мышь
1. Включите мышь.
2. Нажмите кнопку Bluetooth для выбора канала, к которому подключено
устройство. Соответствующие зеленый и синий светодиоды состояния
мигают быстро.
3. Чтобы выполнить сопряжение, нажмите и удерживайте кнопку Bluetooth
не менее трех секунд. Соответствующие зеленый и синий светодиоды
состояния мигают медленно. Мышь обнаруживается в течение 2 минут.
4.Выполните на своем устройстве сопряжение по Bluetooth. После
установки сопряжения между вашим устройством и мышью индикатор
погаснет.
Сопряжение по Bluetooth
Windows®7 и 8:
1. Нажмите кнопку «Пуск», выберите «Панель управления» > «Добавить
устройство»
2. Выберите клавиатуру или мышь из списка.*
3. Нажмите кнопку «Далее» и следуйте остальным инструкциям, которые
могут появиться на экране.
Windows®10:
1. Нажмите кнопку «Пуск», выберите «Настройки» > «Устройства» > Bluetooth.
2. Выберите клавиатуру или мышь из списка.*
3. Нажмите кнопку «Сопряжение» и следуйте остальным инструкциям,
которые могут появиться на экране.
*RAPOO BT3.0 KB/RAPOO BLE KB/Rapoo BleMouse/RAPOO BT3.0 Мышь
Клавіатура
1. Натискайте і утримуйте комбінації клавіш Fn+1, Fn+2 або Fn+3 щонайменше
протягом 3 секунд, Cвітлодіоди статусу повільно мерехтять, Клавіатуру видно
протягом 60 секунд,щоб поєднати в пару 3 різних пристрої по Bluetooth.
2. Завершіть поєднання в пару Bluetooth на пристрої.
Миша
1. Увімкніть мишу.
2. Натисніть кнопку Bluetooth для вибору каналу, до якого підключено ваш
пристрій. Відповідні зелений і синій світлодіоди статусу швидко мерехтять.
3. Натисніть і утримуйте кнопку Bluetooth щонайменше три секунди, щоб
поєднати у пару. Відповідні зелений та блакитний світлодіоди статусу
повільно мерехтять. Мишу видно протягом 2 хвилин.
4. Завершіть поєднання в пару Bluetooth на пристрої. Коли мишу і ваш
пристрій поєднано в пару, лампочка статусу вимикається.
Поєднання в пару по Bluetooth
Windows®7 і 8:
1. Клацніть кнопку Start (Пуск), потім виберіть Control Panel (Контрольна
панель) > Add a device (Додати пристрій)
2. Виберіть зі списку мишу або клавіатуру.*
3. Клацніть Next (Далі) та виконуйте всі наступні інструкції, що з'являться на
екрані.
Windows®10:
1. Клацніть кнопку Start (Пуск), виберіть Settings (Налаштування) > Devices
(Пристрої) > Bluetooth.
2. Виберіть клавіатуру або мишу зі списку.*
3. Клацніть Pair (Поєднати у пару) і виконуйте всі наступні інструкції, що
з'являться на екрані.
* Миша RAPOO BT3.0 KB/RAPOO BLE KB/Rapoo BleMouse/RAPOO BT3.0
Keyboard
1. Press and hold key combinations, Fn+1, Fn+2 or Fn+3 at least 3 seconds,
Status LED flashes slowly,the keyboard is discoverable for 60 seconds,to pair 3
different devices via Bluetooth.
2. Complete Bluetooth pairing on your device.
Mouse
1. Turn on the mouse.
2. Press Bluetooth button to select the channel on which your device is
connected. Respective green and blue Status LED flash rapidly.
3. Press and hold Bluetooth button at least three seconds to pair. Respective
green and blue Status LED flash slowly. The mouse is discoverable for 2 minutes.
4. Complete Bluetooth pairing on your device. When the mouse and your device
are paired, the light turns off.
Bluetooth pairing
Windows®7 and 8:
1.Click the "Start" button, then select Control Panel > Add a device
2.Select the keyboard or mouse from the list.*
3.Click Next and follow any other instructions that may appear on the screen.
Windows®10:
1.Click the "Start" button, then select Settings > Devices > Bluetooth.
2.Select the keyboard or mouse from the list.*
3. Click Pair and follow any other instructions that may appear on the screen.
*RAPOO BT3.0 KB/RAPOO BLE KB/Rapoo BleMouse/RAPOO BT3.0 Mouse
Clavier
1. Appuyez et maintenez les combinaisons de touches Fn+1, Fn+2 ou Fn+3
enfoncées au moins 3 secondes , Les LED de statut clignotent lentement,le clavier
est détectable pendant 60 secondes, pour appairer 3 appareils différents via
Bluetooth.
2. Effectuez l'appairage Bluetooth sur votre appareil.
Souris
1. Allumez la souris.
2. Appuyez sur le bouton Bluetooth pour sélectionner le canal sur lequel votre
appareil est connecté. Les LED de statut verte et bleue correspondantes
clignotent rapidement.
3. Appuyez et maintenez le bouton Bluetooth enfoncé au moins trois secondes
pour effectuer l'appairage. Les LED de statut verte et bleue correspondantes
clignotent lentement. La souris est détectable pendant 2 minutes.
4.Effectuez l'appairage Bluetooth sur votre appareil. Une fois la souris et votre
appareil appairés, l'indicateur lumineux s'éteint.
Appairage Bluetooth
Windows®7 et 8:
1.Cliquez sur le bouton "Démarrer", puis sélectionnez Panneau de configuration
> Ajouter un périphérique
2.Sélectionnez le clavier ou la souris dans la liste.*
3.Cliquez sur Suivant et suivez les autres instructions pouvant apparaître à
l'écran.
Windows®10:
1.Cliquez sur le bouton "Démarrer", puis sélectionnez Paramètres > Périphériques >
Bluetooth.
2.Sélectionnez le clavier ou la souris dans la liste.*
3. Cliquez sur Appairer et suivez les autres instructions pouvant apparaître à
l'écran.
*Clavier RAPOO BT3.0/Clavier RAPOO BLE/Souris Rapoo BleMouse/Souris RAPOO
BT3.0
Tastatur
1. Halten Sie Tastenkombinationen, Fn+1, Fn+2 oder Fn+3, mindestens 3
Sekunden gedrückt, Status-LED blinken langsam,die Tastatur ist 60 Sekunden
lang auffindbar,um 3 verschiedene Geräte über Bluetooth zu koppeln.
2. Schließen Sie die Bluetooth-Kopplung an Ihrem Gerät ab.
Maus
1. Schalten Sie die Maus ein.
2. Wählen Sie mit der Bluetooth-Taste den Kanal, in dem Ihr Gerät verbunden ist.
Die entsprechende grüne und blaue Status-LED blinken schnell.
3. Halten Sie die Bluetooth-Taste zum Koppeln mindestens drei Sekunden lang
gedrückt. Die entsprechende grüne und blaue Status-LED blinken langsam. Die
Maus ist 2 Minuten lang erkennbar.
4.Schließen Sie die Bluetooth-Kopplung an Ihrem Gerät ab.Wenn Maus und Gerät
gekoppelt sind, erlischt die Leuchte.
Bluetooth-Kopplung
Windows®7 und 8:
1. Klicken Sie auf die Start-Schaltfläche und wählen Sie Systemsteuerung > Gerät
hinzufügen
2. Wählen Sie Tastatur oder Maus aus der Liste.*
3. Klicken Sie auf Weiter und befolgen Sie möglicherweise am Bildschirm
angezeigten Anweisungen.
Windows®10:
1. Klicken Sie auf die Start-Schaltfläche, wählen Sie dann Einstellungen > Geräte >
Bluetooth.
2. Wählen Sie Tastatur oder Maus aus der Liste.*
3. Klicken Sie auf Koppeln und befolgen Sie die möglicherweise am Bildschirm
angezeigten Anweisungen.
*RAPOO BT3.0 KB/RAPOO BLE KB/Rapoo BleMouse/RAPOO BT3.0 Mouse
Tastiera
1. Tenere premuta la combinazione di tasti Fn+1, Fn+2 o Fn+3 per almeno 3
secondi,LED di stato lampeggia lentamente,la tastiera è rilevabile per 60
secondi,per associare 3 diversi dispositivi tramite Bluetooth.
2. Completare l'associazione Bluetooth sul dispositivo.
Mouse
1. Accendere il mouse.
2. Premere il tasto Bluetooth per selezionare il canale sul quale è collegato il
dispositivo. Il rispettivo LED di stato verde e blu lampeggia rapidamente.
3. Tenere premuto il tasto Bluetooth per almeno tre secondi per l'associazione. Il
rispettivo LED di stato verde e blu lampeggia lentamente. Il mouse è rilevabile per
2 minuti.
4.Completare l'associazione Bluetooth sul dispositivo. Una volta associati il
mouse e il dispositivo, la spia si spegne.
Associazione Bluetooth
Windows®7 e 8:
1.Fare clic sul tasto "Start", quindi selezionare Pannello di controllo > Aggiungi un
dispositivo.
2.Selezionare la tastiera o il mouse dall'elenco.*
3.Fare clic su Avanti e seguire le istruzioni che appaiono sullo schermo.
Windows®10:
1.Fare clic sul tasto "Start", quindi selezionare Impostazioni > Dispositivi >
Bluetooth.
2.Selezionare la tastiera o il mouse dall'elenco.*
3. Fare clic su Associa e seguire le istruzioni che appaiono sullo schermo.
*RAPOO BT3.0 KB/RAPOO BLE KB/Rapoo BleMouse/Mouse RAPOO BT3.0
Teclado
1. Presione sin soltar las combinaciones de teclas Fn+1, Fn+2 o Fn+3 al menos 3
segundos ,Los LED de estado parpadean lentamente, el teclado pasará a estar
detectable durante 60 segundos, para asociar 3 dispositivos diferentes a través
de Bluetooth.
2. Complete la asociación Bluetooth en el dispositivo.
Ratón
1. Encienda el ratón.
2. Presione el botón Bluetooth para seleccionar el canal en el que dicho
dispositivo está conectado. Los LED de estado verde y azul respectivos
parpadean rápidamente.
3. Presione sin soltar el botón de Bluetooth al menos durante tres segundos para
realizar la asociación. Los LED de estado verde y azul respectivos parpadean
lentamente. El ratón pasará a estar detectable durante 2 minutos.
4. Complete la asociación Bluetooth en el dispositivo. Cuando el ratón y el
dispositivo estén asociados, la luz se apagará.
Asociación Bluetooth
Windows®7 y 8:
1. Haga clic en el botón "Inicio" y, a continuación, seleccione Panel de control >
Agregar un dispositivo.
2. Seleccione el teclado o ratón en la lista.*
3. Haga clic en Siguiente y siga todas las instrucciones que aparezcan en la
pantalla.
Windows®10:
1. Haga clic en el botón "Inicio" y seleccione Configuración > Dispositivos >
Bluetooth.
2. Seleccione el teclado o ratón en la lista.*
3. Haga clic en Asociar y siga todas las instrucciones que aparezcan en la pantalla.
*RAPOO BT3.0 KB/RAPOO BLE KB/Rapoo BleMouse/Ratón RAPOO BT3.0
Toetsenbord
1. Houd de sneltoets Fn+1, Fn+2 of Fn+3 minstens 3 seconden ,Statuslampjes
knipperen langzaam.,het toetsenbord is 60 seconden detecteerbaar,ingedrukt
om 3 verschillende apparaten te koppelen via Bluetooth.
2. Voltooi de Bluetooth-koppeling op uw apparaat.
Muis
1. Schakel de muis in.
2. Druk op de Bluetooth-knop om het kanaal waarmee uw apparaat verbonden is,
te selecteren. De respectieve groen en blauwe statuslampjes knipperen snel.
3. Houd de Bluetooth-knop minstens drie seconden ingedrukt om te koppelen.
De respectieve groen en blauwe statuslampjes knipperen langzaam. De muis is
gedurende 2 minuten opspoorbaar.
4. Voltooi de Bluetooth-koppeling op uw apparaat. Wanneer de muis en uw
apparaat zijn gekoppeld, gaat het lampje uit.
Bluetooth-koppeling
Windows®7 en 8:
1. Klik op de knop "Start" en selecteer vervolgens Configuratiescherm > Een
apparaat toevoegen
2.Selecteer het toetsenbord of de muis in de lijst.*
3. Klik op Volgende en volg alle overige instructies die mogelijk verschijnen op het
scherm.
Windows®10:
1. Klik op de knop "Start" en selecteer vervolgens Instellingen > Apparaten >
Bluetooth.
2. Selecteer het toetsenbord of de muis in de lijst.*
3. Klik op Koppelen en volg eventuele andere instructies die mogelijk verschijnen
op het scherm.
*RAPOO BT3.0 KB/RAPOO BLE KB/Rapoo BleMouse/RAPOO BT3.0 muis
System Requirements / Exigences du système / Systemvoraussetzungen / Requisiti di sistema / Requerimientos del sistema / Systeemvereisten /
Requisitos do Sistema / Системные требования / Системні вимоги
Windows
®
XP / Vista / 7 / 8 / 10 or later, USB port
Windows
®
XP / Vista / 7 / 8 / 10 o versioni successive, Porta USB Windows
®
XP / Vista / 7 / 8 / 10 ou mais recente, porta USB
Windows
®
XP / Vista / 7 / 8 / 10 ou version ultérieure, Port USB
Windows
®
XP / Vista / 7 / 8 / 10 o posterior, Puerto USB Windows
®
XP / Vista / 7 / 8 / 10 или более поздней версии, USB порт
Windows
®
XP / Vista / 7 / 8 / 10 oder höher, USB-Anschluss
Windows
®
XP / Vista / 7 / 8 / 10 of later, USB-poort Windows
®
XP / Vista / 7 / 8 / 10 або вище, порт USB


Λάβετε μέρος στη συζήτηση σχετικά με αυτό το προϊόν
Εδώ μπορείτε να μοιραστείτε τη γνώμη σας για το Rapoo 8200T Ποντίκι. Εάν έχετε κάποια ερώτηση, διαβάστε πρώτα προσεκτικά το εγχειρίδιο. Το να ζητήσετε ένα εγχειρίδιο μπορεί να γίνει χρησιμοποιώντας τη φόρμα επικοινωνίας μας.