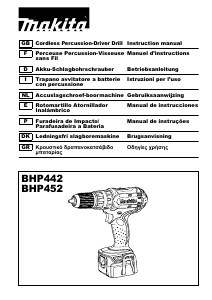
Εγχειρίδιο Makita BHP452 Κρουστικό δράπανο

Χρειάζεστε ένα εγχειρίδιο για το Makita BHP452 Κρουστικό δράπανο σας; Παρακάτω μπορείτε να δείτε και να κατεβάσετε το εγχειρίδιο PDF δωρεάν στα Αγγλικά. Αυτό το προϊόν έχει αυτήν τη στιγμή 3 συχνές ερωτήσεις, 0 σχόλια και 0 ψήφους. Εάν αυτό δεν είναι το εγχειρίδιο που θέλετε, επικοινωνήστε μαζί μας.

Είναι ελαττωματικό το προϊόν σας και το εγχειρίδιο δεν προσφέρει λύση; Πηγαίνετε σε ένα Repair Café για δωρεάν υπηρεσίες επισκευής.

Εγχειρίδιο

Loading…

7
Speed change (Fig. 5)
To change the speed, first switch off the tool and then
slide the speed change lever to the “2” side for high speed
or “1” side for low speed. Be sure that the speed change
lever is set to the correct position before operation. Use
the right speed for your job.
CAUTION:
Always set the speed change lever fully to the correct
position. If you operate the tool with the speed change
lever positioned halfway between the “1” side and “2”
side, the tool may be damaged.
Do not use the speed change lever while the tool is
running. The tool may be damaged.
Selecting the action mode (Fig. 6)
This tool employs an action mode changing ring. Select
one of the three modes suitable for your work needs by
using this ring.
For rotation only, turn the ring so that the arrow on the tool
body points toward the mark on the ring.
For rotation with hammering, turn the ring so that the
arrow points toward the mark on the ring.
For rotation with clutch, turn the ring so that the arrow
points toward the mark on the ring.
CAUTION:
Always set the ring correctly to your desired mode
mark. If you operate the tool with the ring positioned
halfway between the mode marks, the tool may be
damaged.
Adjusting the fastening torque (Fig. 7)
The fastening torque can be adjusted in 16 steps by
turning the adjusting ring so that its graduations are
aligned with the arrow on the tool body. The fastening
torque is minimum when the number 1 is aligned with the
arrow, and maximum when the number 16 is aligned with
the arrow.
Before actual operation, drive a trial screw into your
material or a piece of duplicate material to determine
which torque level is required for a particular application.
ASSEMBLY
CAUTION:
Always be sure that the tool is switched off and the
battery cartridge is removed before carrying out any
work on the tool.
Installing or removing driver bit or drill bit
(Fig. 8)
Turn the sleeve counterclockwise to open the chuck jaws.
Place the bit in the chuck as far as it will go. Turn the
sleeve clockwise to tighten the chuck.
To remove the bit, turn the sleeve counterclockwise.
Installing bit holder (accessory) (Fig. 9)
Fit the bit holder into the protrusion at the tool foot on
either right or left side and secure it with a screw.
When not using the driver bit, keep it in the bit holders.
Bits 45 mm long can be kept there.
Hook (Accessory) (Fig. 10)
The hook is convenient for temporarily hanging the tool.
This can be installed on either side of the tool.
To install the hook, insert it into a groove in the tool
housing on either side and then secure it with a screw.
To remove, loosen the screw and then take it out.
OPERATION
CAUTION:
Always insert the battery cartridge all the way until it
locks in place. If you can see the red part on the upper
side of the button, it is not locked completely. Insert it
fully until the red part cannot be seen. If not, it may
accidentally fall out of the tool, causing injury to you or
someone around you.
Hold the tool firmly with one hand on the grip and the
other hand on the bottom of the battery cartridge to
control the twisting action.
Hammer drilling operation
CAUTION:
There is a tremendous and sudden twisting force
exerted on the tool/bit at the time of hole break-
through, when the hole becomes clogged with chips
and particles, or when striking reinforcing rods
embedded in the concrete.
First, turn the action mode changing ring so that the arrow
on the tool body points to the marking. The adjusting
ring can be aligned in any torque levels for this operation.
Be sure to use a tungsten-carbide tipped bit.
Position the bit at the desired location for the hole, then
pull the switch trigger. Do not force the tool. Light
pressure gives best results. Keep the tool in position and
prevent it from slipping away from the hole.
Do not apply more pressure when the hole becomes
clogged with chips or particles. Instead, run the tool at an
idle, then remove the bit partially from the hole. By
repeating this several times, the hole will be cleaned out
and normal drilling may be resumed.
Blow-out bulb (optional accessory)
(Fig. 11)
After drilling the hole, use the blow-out bulb to clean the
dust out of the hole.
Screwdriving operation (Fig. 12)
First, turn the action mode changing ring so that the arrow
on the tool body points to the marking. Adjust the
adjusting ring to the proper torque level for your work.
Then proceed as follows.
Place the point of the driver bit in the screw head and
apply pressure to the tool. Start the tool slowly and then
increase the speed gradually. Release the switch trigger
as soon as the clutch cuts in.
CAUTION:
Make sure that the driver bit is inserted straight in the
screw head, or the screw and/or bit may be damaged.
NOTE:
When driving wood screws, predrill pilot holes to make
driving easier and to prevent splitting of the workpiece.
See the chart.
Λήψη εγχειριδίου στα ελληνικά (PDF, 1.26 MB)
(Σκεφτείτε το περιβάλλον και εκτυπώστε αυτό το εγχειρίδιο μόνο εάν είναι πραγματικά απαραίτητο)

Loading…

Βαθμολογία

Πείτε μας τη γνώμη σας για το Makita BHP452 Κρουστικό δράπανο βαθμολογώντας ένα προϊόν. Θέλετε να μοιραστείτε τις εμπειρίες σας με αυτό το προϊόν ή να θέσετε μια ερώτηση; Αφήστε ένα σχόλιο στο κάτω μέρος της σελίδας.
Είστε ικανοποιημένοι με το Makita BHP452 Κρουστικό δράπανο?
Ναι Όχι
Γίνε ο πρώτος που θα βαθμολογήσει αυτό το προϊόν
0 ψήφοι

Λάβετε μέρος στη συζήτηση σχετικά με αυτό το προϊόν

Εδώ μπορείτε να μοιραστείτε τη γνώμη σας για το Makita BHP452 Κρουστικό δράπανο. Εάν έχετε κάποια ερώτηση, διαβάστε πρώτα προσεκτικά το εγχειρίδιο. Το να ζητήσετε ένα εγχειρίδιο μπορεί να γίνει χρησιμοποιώντας τη φόρμα επικοινωνίας μας.

Περισσότερα για αυτό το εγχειρίδιο

Κατανοούμε ότι είναι ωραίο να έχετε ένα χάρτινο εγχειρίδιο για το Makita BHP452 Κρουστικό δράπανο σας. Μπορείτε πάντα να κατεβάσετε το εγχειρίδιο από τον ιστότοπό μας και να το εκτυπώσετε μόνοι σας. Εάν θέλετε να έχετε ένα πρωτότυπο εγχειρίδιο, σας συνιστούμε να επικοινωνήσετε με το Makita. Μπορεί να είναι σε θέση να παρέχουν ένα πρωτότυπο εγχειρίδιο. Αναζητάτε το εγχειρίδιο του Makita BHP452 Κρουστικό δράπανο σας σε διαφορετική γλώσσα; Επιλέξτε τη γλώσσα που προτιμάτε στην αρχική μας σελίδα και αναζητήστε τον αριθμό μοντέλου για να δείτε αν τον έχουμε διαθέσιμο.

Προδιαγραφές

Μάρκα Makita
Μοντέλο BHP452
Κατηγορία Κρουστικά δράπανα
Τύπος αρχείου PDF
Μέγεθος αρχείου 1.26 MB

Όλα τα εγχειρίδια για Makita Κρουστικά δράπανα
Περισσότερα εγχειρίδια του Κρουστικά δράπανα

Συχνές ερωτήσεις σχετικά με Makita BHP452 Κρουστικό δράπανο

Η ομάδα υποστήριξής μας αναζητά χρήσιμες πληροφορίες προϊόντος και απαντήσεις σε συχνές ερωτήσεις. Εάν εντοπίσετε ανακρίβεια στις συνήθεις ερωτήσεις μας, ενημερώστε μας χρησιμοποιώντας τη φόρμα επικοινωνίας.

Ποια είναι η διαφορά μεταξύ ενός τρυπανιού κρούσης και ενός περιστροφικού σφυριού; Επαληθεύτηκε

Τα τρυπάνια κρούσης μπορούν να χρησιμοποιηθούν για διάτρηση οπών σε τούβλα και τοίχους κονιάματος. Για διάτρηση οπών σε τοίχους από μπετόν χρειάζεστε περιστροφικό σφυρί.

Αυτό ήταν χρήσιμο (108) Διαβάστε περισσότερα

Πρέπει να φοράω προστασία ακοής όταν χρησιμοποιώ τρυπάνι; Επαληθεύτηκε

Ναι θα έπρεπε. Παρόλο που η ποσότητα του θορύβου που παράγεται από ένα τρυπάνι μπορεί να ποικίλει μεταξύ εμπορικών σημάτων και μοντέλων, η μακροχρόνια έκθεση σε δυνατό θόρυβο μπορεί να προκαλέσει μόνιμη βλάβη στην ακοή. Γι 'αυτό είναι καλή ιδέα να φοράτε προστατευτική ακοή.

Αυτό ήταν χρήσιμο (22) Διαβάστε περισσότερα

Μπορώ να αποθηκεύσω ηλεκτρικά εργαλεία σε υπόστεγο ή γκαράζ; Επαληθεύτηκε

Γενικά, μπορείτε να αποθηκεύσετε ηλεκτρικά εργαλεία σε ένα υπόστεγο ή γκαράζ, ακόμα κι αν μερικές φορές παγώνει εκεί. Ωστόσο, είναι καλύτερο για τη διάρκεια ζωής του ηλεκτρικού εργαλείου να το αποθηκεύετε σε ξηρό μέρος χωρίς μεγάλες διακυμάνσεις θερμοκρασίας. Σε ένα υπόστεγο ή γκαράζ, οι διαφορές στη θερμοκρασία μπορεί να προκαλέσουν τη δημιουργία συμπύκνωσης, η οποία μπορεί να προκαλέσει σκουριά. Επιπλέον, τα εργαλεία που λειτουργούν με μπαταρίες διαρκούν λιγότερο και δεν φορτίζουν το ίδιο καλά σε πολύ χαμηλές θερμοκρασίες. Για να είστε σίγουροι πώς πρέπει να αποθηκεύεται το ηλεκτρικό εργαλείο σας, διαβάζετε πάντα προσεκτικά το εγχειρίδιο χρήσης.

Αυτό ήταν χρήσιμο (4) Διαβάστε περισσότερα
Εγχειρίδιο Makita BHP452 Κρουστικό δράπανο

Σχετικά προϊόντα

Σχετικές κατηγορίες