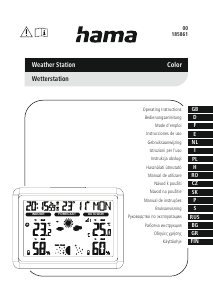
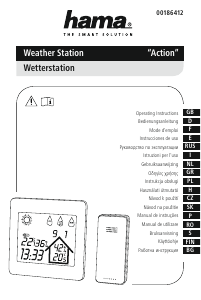
Εγχειρίδιο Hama EWS-390 Μετεωρολογικός σταθμός
Χρειάζεστε ένα εγχειρίδιο για το Hama EWS-390 Μετεωρολογικός σταθμός σας; Παρακάτω μπορείτε να δείτε και να κατεβάσετε το εγχειρίδιο PDF δωρεάν στα Αγγλικά. Αυτό το προϊόν έχει αυτήν τη στιγμή 5 συχνές ερωτήσεις, 0 σχόλια και 3 ψήφους με μέση βαθμολογία προϊόντος 67/100. Εάν αυτό δεν είναι το εγχειρίδιο που θέλετε, επικοινωνήστε μαζί μας.
Είναι ελαττωματικό το προϊόν σας και το εγχειρίδιο δεν προσφέρει λύση; Πηγαίνετε σε ένα Repair Café για δωρεάν υπηρεσίες επισκευής.
Εγχειρίδιο
Loading…

Loading…
Βαθμολογία
Πείτε μας τη γνώμη σας για το Hama EWS-390 Μετεωρολογικός σταθμός βαθμολογώντας ένα προϊόν. Θέλετε να μοιραστείτε τις εμπειρίες σας με αυτό το προϊόν ή να θέσετε μια ερώτηση; Αφήστε ένα σχόλιο στο κάτω μέρος της σελίδας.Περισσότερα για αυτό το εγχειρίδιο
Κατανοούμε ότι είναι ωραίο να έχετε ένα χάρτινο εγχειρίδιο για το Hama EWS-390 Μετεωρολογικός σταθμός σας. Μπορείτε πάντα να κατεβάσετε το εγχειρίδιο από τον ιστότοπό μας και να το εκτυπώσετε μόνοι σας. Εάν θέλετε να έχετε ένα πρωτότυπο εγχειρίδιο, σας συνιστούμε να επικοινωνήσετε με το Hama. Μπορεί να είναι σε θέση να παρέχουν ένα πρωτότυπο εγχειρίδιο. Αναζητάτε το εγχειρίδιο του Hama EWS-390 Μετεωρολογικός σταθμός σας σε διαφορετική γλώσσα; Επιλέξτε τη γλώσσα που προτιμάτε στην αρχική μας σελίδα και αναζητήστε τον αριθμό μοντέλου για να δείτε αν τον έχουμε διαθέσιμο.
Προδιαγραφές
| Μάρκα | Hama |
| Μοντέλο | EWS-390 |
| Κατηγορία | Μετεωρολογικοί σταθμοί |
| Τύπος αρχείου | |
| Μέγεθος αρχείου | 8.62 MB |
Όλα τα εγχειρίδια για Hama Μετεωρολογικοί σταθμοί
Περισσότερα εγχειρίδια του Μετεωρολογικοί σταθμοί
Συχνές ερωτήσεις σχετικά με Hama EWS-390 Μετεωρολογικός σταθμός
Η ομάδα υποστήριξής μας αναζητά χρήσιμες πληροφορίες προϊόντος και απαντήσεις σε συχνές ερωτήσεις. Εάν εντοπίσετε ανακρίβεια στις συνήθεις ερωτήσεις μας, ενημερώστε μας χρησιμοποιώντας τη φόρμα επικοινωνίας.
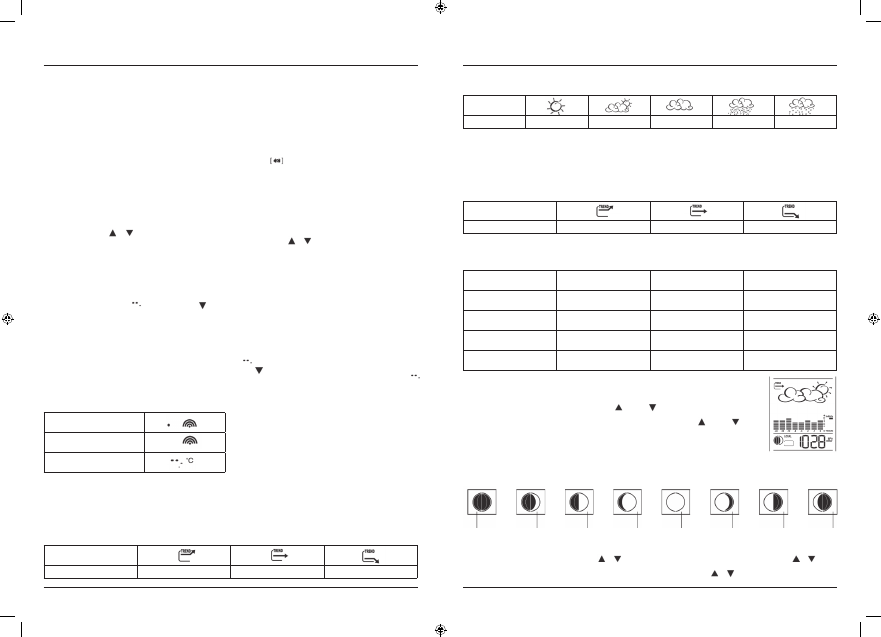
Ο μετεωρολογικός σταθμός μου προέβλεπε ότι θα βρέξει, αλλά αυτό δεν συνέβη. Γιατί αυτό? Επαληθεύτηκε
Η πρόβλεψη για τον μετεωρολογικό σταθμό βασίζεται στην πίεση του αέρα. Γενικά η χαμηλή πίεση σημαίνει κακές καιρικές συνθήκες και η υψηλή πίεση σημαίνει καλός καιρός. Είναι πιθανό το μοτίβο καιρού να αναπτυχθεί διαφορετικά από ό, τι προβλέπει η πίεση του αέρα.
Αυτό ήταν χρήσιμο (1468) Διαβάστε περισσότεραΠοια είναι η καλύτερη τοποθεσία για έναν μετεωρολογικό σταθμό και τους αισθητήρες του; Επαληθεύτηκε
Ο ίδιος ο μετεωρολογικός σταθμός είναι τοποθετημένος μέσα και πρέπει να φυλάσσεται μακριά από πηγές θερμότητας, όπως κουζίνα, παράθυρα ή ηλεκτρικές συσκευές. Ένας ξεχωριστός εξωτερικός αισθητήρας θερμοκρασίας πρέπει να τοποθετηθεί σε σκιά και τουλάχιστον 1,25 μέτρα πάνω από το έδαφος. Ένας αισθητήρας βροχής πρέπει να τοποθετηθεί σε μια ανοιχτή περιοχή όπου μπορεί πάντα να συλλέγει βροχή. Ένας αισθητήρας ανέμου πρέπει να τοποθετηθεί και σε ανοιχτή περιοχή, με τυχόν εμπόδια να επηρεάζουν τον άνεμο.
Αυτό ήταν χρήσιμο (394) Διαβάστε περισσότεραΟ μετεωρολογικός σταθμός μου έχει μετρητή βροχής, μπορεί επίσης να μετρήσει την ποσότητα των χιονοπτώσεων; Επαληθεύτηκε
Ορισμένοι μετρητές βροχής είναι εξοπλισμένοι με θερμαντικό στοιχείο, καθιστώντας το χιόνι λιώσιμο και επιτρέποντας τη μέτρηση. Χωρίς θερμαντικό στοιχείο το μανόμετρο θα φράξει και δεν μπορεί να γίνει μέτρηση.
Αυτό ήταν χρήσιμο (280) Διαβάστε περισσότεραΜια μπαταρία στη συσκευή μου είναι οξειδωμένη, μπορώ να την χρησιμοποιήσω με ασφάλεια; Επαληθεύτηκε
Ωστόσο, η συσκευή μπορεί να χρησιμοποιηθεί με ασφάλεια. Αρχικά, αφαιρέστε την μπαταρία οξειδωτικού. Ποτέ μην χρησιμοποιείτε γυμνά χέρια για να το κάνετε αυτό. Στη συνέχεια, καθαρίστε τη θήκη της μπαταρίας με βαμβακερό στυλεό βουτηγμένο σε ξύδι ή χυμό λεμονιού. Αφήστε το να στεγνώσει και τοποθετήστε νέες μπαταρίες.
Αυτό ήταν χρήσιμο (279) Διαβάστε περισσότεραΜπορώ να αφήσω μια αντικαταστάσιμη μπαταρία σε μια συσκευή για μεγάλο χρονικό διάστημα; Επαληθεύτηκε
Οι αντικαταστάσιμες μπαταρίες μπορούν να παραμείνουν στη συσκευή για μεγάλο χρονικό διάστημα εάν η συσκευή χρησιμοποιείται. Όταν μια συσκευή αποθηκεύεται για μεγάλο χρονικό διάστημα, συνιστάται να αφαιρέσετε τις μπαταρίες για να αποφύγετε την οξείδωση.
Αυτό ήταν χρήσιμο (279) Διαβάστε περισσότερα
Λάβετε μέρος στη συζήτηση σχετικά με αυτό το προϊόν
Εδώ μπορείτε να μοιραστείτε τη γνώμη σας για το Hama EWS-390 Μετεωρολογικός σταθμός. Εάν έχετε κάποια ερώτηση, διαβάστε πρώτα προσεκτικά το εγχειρίδιο. Το να ζητήσετε ένα εγχειρίδιο μπορεί να γίνει χρησιμοποιώντας τη φόρμα επικοινωνίας μας.