HA65S
Authorized representative
Mr. Ad Netten
Date:08.05.2008
Company ROOS ELECTRONICS
Address, City Broekakkerweg 15 5126 BD
Postbus 115, 5126 ZJ GILZE
Country The Netherlands
Declare that the product:
Description
Product number HA65S
Trade mark ELRO
Is herewith confirmed to comply with the requirements set in the
Council Directive on the Approximation of the Member States
relating to:
Electro Magnetic Compatibility Directive (89/336/EEC)
R&TTE Directive (1999/5/EEC)
LVD Directive (73/23/EEC)
Assessment of compliance of the product with the requirements
relating to EMC was based on the following standard : EN 301489-
1:V1.4.1:2002: EN 301489-3:V1.4.1:2002
The requirements relating Electrical Safety were
based on the following standard: EN 60065:2002
EN 60598-1:2004+A1:2006 - EN 60598-2-1:1989
EN 60598-2-3:2003
The requirements relating RF was based on the following standard:
EN 300440-1 :V1.3.1:2001 - EN 300440-2 :V1..1.1:2001
EN 300220-3 :V1.1.1:2000
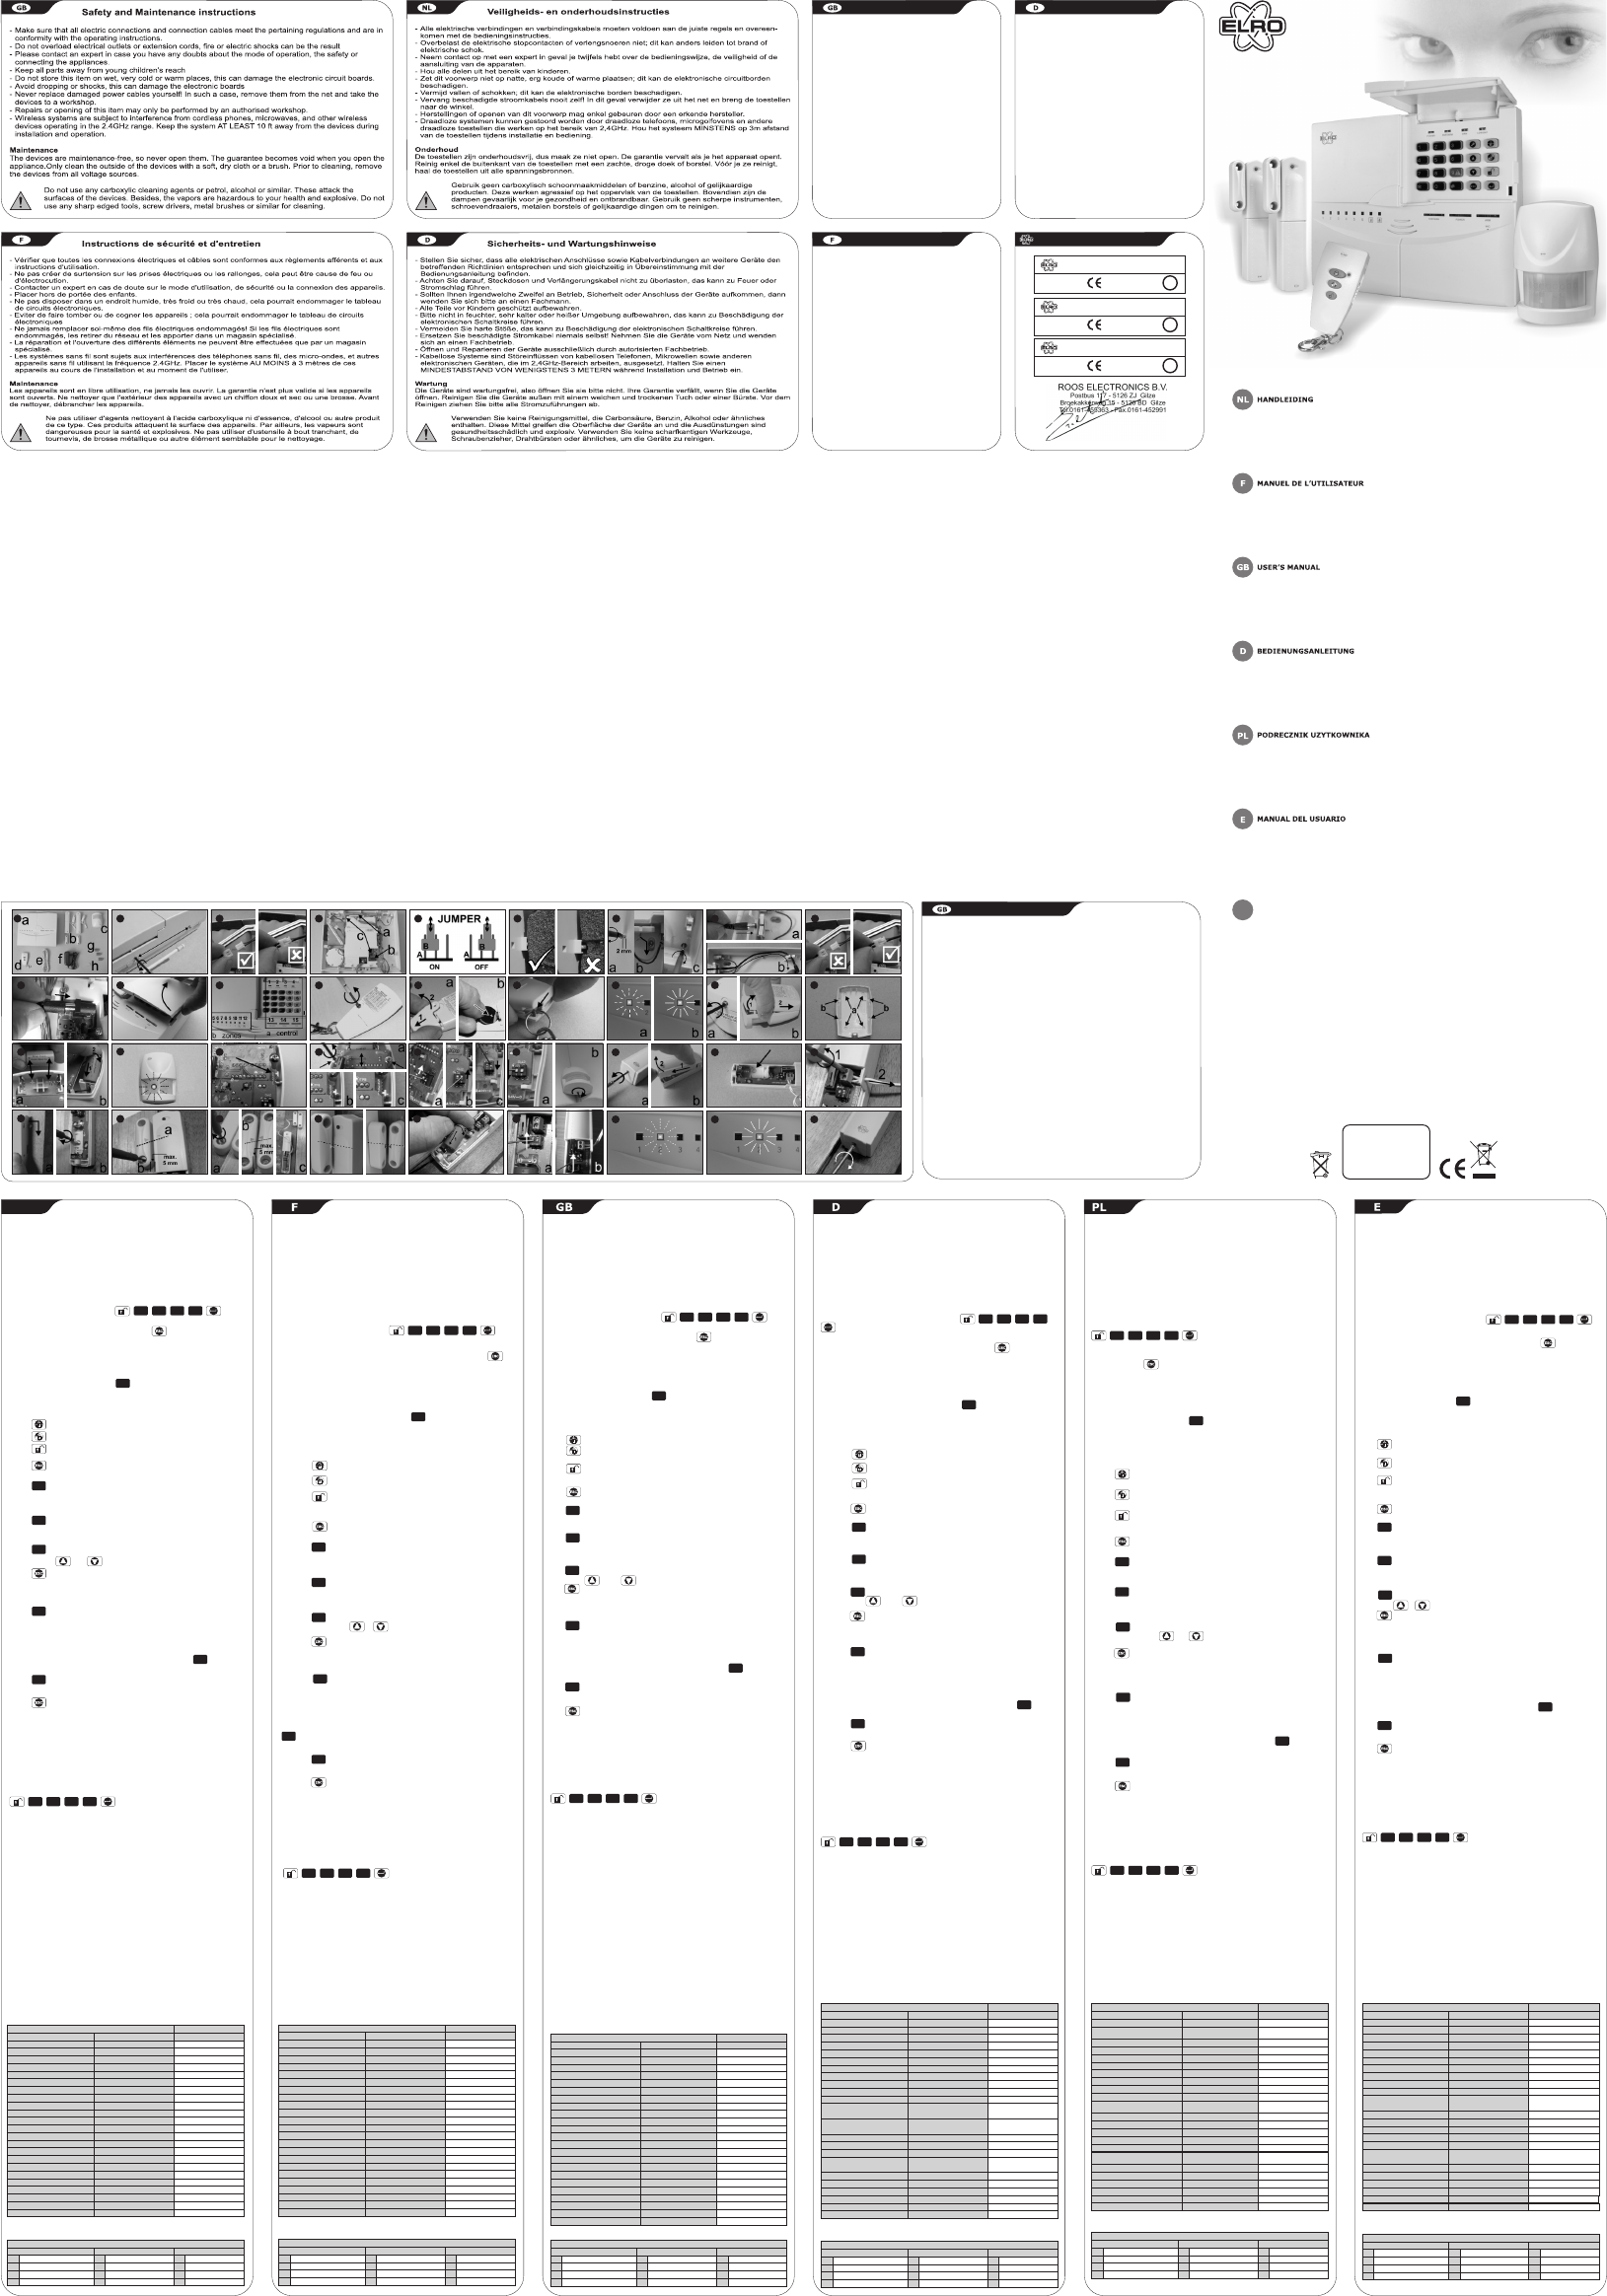
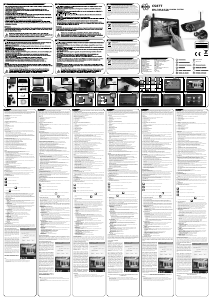
2 zone wireless alarmsystem
DECLARATION OF CONFORMITY
Firma ROOS ELECTRONICS
Adresse Broekakkerweg 15, 5126 BD
Postbox 115, 5126 ZJ GILZE
Land Niederlande
Erklärung des Produktes:
Artikelbeschreibung
Artikel-Nr.: HA65S
Markenname: ELRO
Hiermit bestätigen wir, um die Anforderungen aus den Richtlinien
des Rates über die Annäherung der Mitgliedsstaaten zu befolgen, die
Anerkennung folgender Richtlinien:
Elektromagnetische Verträglichkeit (EMC)(89/336/EEC)
R&TTE-Anforderung (1999/5/EEC)
Niederspannungsrichtlinie (LVD)(73/23.EEC)
Die Bewertung des Produktes bezüglich der Anforderung
bezüglich EMC basiert auf den folgenden Standards:
EN 301489-1:V1.4.1:2002 - EN 301489-3:V1.4.1:2002
Die Anforderungen bezuglich Elektrisch Sicherheit basiert auf den
folgenden Standards: EN 60065:2002 - EN 60598-1:2004+A1:2006
EN 60598-2-1:1989 - EN 60598-2-3:2003
Die Anforderungen bezüglich RF basiert auf den folgenden
Standards: EN 300440-1 :V1.3.1 :2001
EN 300440-2 :V1..1.1 :2001 - EN 300220-3 :V1.1.1 :2000
2 Zone Funk Alarmsystem
KONFORMITÄTSERKLÄRUNG
Société ROOS ELECTRONICS
Adresse/Ville Broekakkerweg 15, 5126 BD
Boite Postale 115
5126 ZJ GILZE
Pays Pays-Bas
Déclarons que le produit:
Description
Référence produit HA65S
Marque de commercialisation ELRO
Est certifié conforme aux exigences définies dans la Directive du
Conseil d'approximation des Etats Membres suivante:
Compatibilité Electro magnétique (89/336/EEC)
Directive R&TTE (1999/5/EEC)
Directive Basse Tension (73/23/EEC)
L'évaluation de conformité du produit par rapport aux exigences de
Compatibilité Electro Magnétique a été effectuée sur la base des
normes suivantes: EN 301489-1:V1.4.1:2002
EN 301489-3:V1.4.1:2002
Les exigences Electriques surete ont été vérifiées par rapport a la
norme suivantes: EN 60065:2002 - EN 60598-1:2004+A1:2006
EN 60598-2-1:1989 - EN 60598-2-3:2003
Les exigences radio ont été vérifiées par rapport à la norme
suivante: EN 300440-1 :V1.3.1 :2001 - EN 300440-2 :V1..1.1 :2001
EN 300220-3:V1.1.1:2000
Système d'alarme sans fil
2 zone
DECLARATION DE CONFORMITE
ROOS ELECTRONICS B.V.
8 ZONE DRAADLOOS ALARMSYSTEEM
- CONTROLE UNIT
- BEWEGINGSMELDER
- 2 x MAGNEETCONTACT
- AFSTANDSBEDIENING
SYSTÈME D'ALARME SANS FIL 8 ZONE
-
-
- 2 x
-
UNITÉ DE CONTRÔLE
DÉTECTEUR DE MOUVEMENTS
CONTACT MAGNÉTIQUE
TÉLÉCOMMANDE
8 ZONE WIRELESS ALARMSYSTEM
- CONTROL UNIT
- MOVEMENT DETECTOR
- 2 x MAGNET CONTACT
- REMOTE CONTROL
8 ZONE FUNK ALARMSYSTEM
- KONTROLLEINHEIT
- BEWEGUNGSMELDER
- 2 x MAGNETKONTAKT
- FERNBEDIENUNG
BEZPRZEWODOWY SYSTEM ALARMOWY
- UK£AD STEROWANIA
- CZUJNIK RUCHU
- 2 x ELEMENTOWE STYKI MAGNETYCZNE
- PILOT ZDALNEGO STEROWANIA
SISTEMA DE ALARMA INALÁMBRICO
- UNIDAD DE CONTROL
- DETECTOR DE MOVIMIENTO
- 2 x CONTACTO MAGNÉTICO
- MANDO A DISTANCIA
400/0000780/43
Batterij vrijgesteld van
milieutaks. Inleveren bij
een Bebat-inzamelpunt.
Pile exonérée d’écotaxe.
A retourner à un point
de collecte Bebat
B
E
B
A
T
R&TTE
APPROVED
0678
!
SA68M MAGNETIC DETECTOR 868MHz.
MA4857C-10E05
R&TTE
APPROVED
0678
!
SA68P MOTIONDETECTOR 868MHz.
MA4857C-10E05
R&TTE
APPROVED
0678
!
SA68R REMOTE 868MHz.
MA4857C-10E05
WARTOÚCI DOMYÚLNE ZMIENIONE d.d.
FUNKCJA WARTOÚÃ/USTAWIENIE NOWE USTAWIENIE
Kod wejúcia 1 2 3 4
Alarm Strefa 1 opóêniono strefy 2-6
bezpoúrednio
Czas opóênienia 30 sekund
Czas trwania alarmu 3 minuty
Czæúciowa aktywacja Strefa 1 = OFF Reszta = ON
Czas transferu syreny Równy trwaniu alarmu
Typ detekcji Strefa 1 - 4 wùamanie
Blokowanie strefy ON
Ostrzeýenie dla wejúcia/wyjúcia ON
Ochrona przed zakùóceniem radiowym ON
Kod domowy dla bezprzewodowego 11110000
MONTAÝU úciennego
Wykorzystanie zamka z kodem Strefa 1 = OFF strefa 2 = OFF
Czas trwania nagranych komunikatów 70 sek.
Próby wywoùañ 3
Numery telefoniczne Brak Patrz poniýej
Komunikaty alarmowe Brak
Zabezpieczenie przed manipulacjà na ON
linii telefonicznej
Poùàczenie przewodowe strefa 5 OFF
Poùàczenie przewodowe strefa 6 OFF
Przewodowa strefa detekcji 5 Wùamanie
Przewodowa strefa detekcji 6 Wùamanie
Przewodowa strefa typu detekcji 5 N.C.
Przewodowa strefa typu detekcji 6 N.C.
WSTÆPNIE ZAPROGRAMOWANE NUMERY TELEFONICZNE
STREFY 1- 6 STREFA GAZU STREFA DYMU
1 1 1
2 2 2
3 3 3
4 4 4
INSTRUKCJE PROGRAMOWANIA SYSTEMU
ALARMOWEGO HA65S
TEST INSTALACJI
Podczas instalacji systemu róýne detektory (SA68P, SA68M) oraz pilot (SA68R) zostaùy
przetestowane pod kàtem dziaùania oraz prawidùowej ùàcznoúci z urzàdzeniem centralnym.
3
TEST OKRESOWY
Poza testem podczas instalacji, konieczne jest okresowe testowanie systemu, aby zapewniã
prawidùowe funkcjonowanie. Urzàdzenie HA68S wyposaýone jest w specjalny program do
wykonywania tego testu. Kilka procedur kontrolnych oraz rutynowych zapewnia wykonanie
caùkowitego testu w systemie oraz wyùapanie kaýdej nieprawidùowoúci czy bùædu. Program
testujàcy moýe byã zainicjowany w danym momencie. Zalecane jest wykonanie testu co najmniej
co 3 miesiàce i oczywiúcie przy kaýdej zmianie instalacji. Dokonywane sà wszystkie kroki w celu
przeprowadzenia testu na panelu kontrolnym w urzàdzeniu centralnym. Wskazówka. Test
powinny wykonywaã 2 osoby, które kontaktujà siæ miædzy sobà.
AKTYWACJA TRYBU TESTOWEGO
Aby wykonaã programowanie kontrolne, najpierw naleýy uruchomiã tryb testowy. Sprawdziã, czy
palà siæ wyùàcznie diody LED w przedniej czæúci i na panelu kontrolnym (tryb 24 HOUR ).
Wprowadziã nastæpujàcy kod na urzàdzeniu centralnym:
System jest obecnie przeùàczony do trybu TEST. Uwaga! Jeúli kod dostæpu byù kiedykolwiek
zmieniany, uýyã nowej kombinacji! Jeúli wszystkie (lub konieczne) testy zostaùy wykonane
nacisnàã przycisk 2x , aby powróciã do trybu 24 HOUR .
PROGRAMOWANIE TESTU
Sprawdziã nastæpujàce pozycje:
1.Brak ruchu na obszarach objætych detektorem ruchu (SA68P).
2.Zamkniæte sà wszystkie okna/drzwi z kontaktem magnetycznym (SA68M).
3.Naleýy zamknàã wszystkie komory baterii dla detektorów.
TESTOWANIE DETEKTORÓW
Ustawiã system w trybie TEST. Nacisnàã , poczym zapala siæ dioda LED strefy 1.
Przejúã siæ po obszarze zabezpieczanym przez detektor ruchu (SA68P) i otworzyã kaýde okno oraz
drzwi wyposaýone w kontakt magnetyczny (SA68M). Przy kaýdym wykryciu rozlegnie siæ sygnaù
dêwiækowy, a dioda LED dla danej strefy zacznie migaã. Nastæpnie otworzyã pokrywæ komory
baterii dla wszystkich detektorów (SA68P oraz SA68M), jedna po drugiej. Za kaýdym razem
powinny zapaliã siæ wszystkie diody LED na urzàdzeniu centralnym. Test dla pilota (SA68R) jest
nastæpujàcy:
Nacisnàã , poczym wszystkie diody LED ARM z przodu oraz na panelu kontrolnym zaczynajà
migaã.
Nacisnàã , poczym wszystkie diody LED PARTARM z przodu oraz na panelu kontrolnym
zaczynajà migaã.
Nacisnàã , poczym wszystkie diody LED POWER z przodu oraz na panelu kontrolnym
zaczynajà migaã.
Przesunàã przycisk alarmowy, znajdujàcy siæ z boku, do góry. Zaczynajà migaã wszystkie diody
LED.
Nacisnàã , aby zatrzymaã test detektora.
TEST TRANSFERU
Nacisnàã , poczym zapala siæ dioda LED strefy 2.
Transfer wewnætrzny w celu kontroli migajàcego úwiatùa lub syreny uruchamia siæ na ok. 5 sek..
TEST SYRENY
Nacisnàã , poczym zapala siæ dioda LED strefy 3.
Syrena na urzàdzeniu centralnym i jakakolwiek inna zewnætrzna lub bezprzewodowa syrena
bædzie uruchomiona na ok. 5 sek.
TEST DIODY LED
Nacisnàã , poczym zapala siæ dioda LED strefy 4.
Nastæpnie uýyã przycisków oraz I sprawdziã, czy wszystkie diody LED zapalajà siæ
jedna po drugiej.
Nacisnàã aby zatrzymaã test diod LED.
(TEST) KONSERWACJA ZEWNÆTRZNEJ SYRENY BEZPRZEWODOWEJ (O ILE JEST
PODÙÀCZONA)
Aby wykonaã konserwacjæ (test), tj. wymianæ baterii, konieczne jest ustawienie syreny w trybie
konserwacji (test). Mimo wszystko, obudowa syreny musi byã zdjæta ze úciany, a w normalnych
warunkach jest to manipulacja.
Nacisnàã , syrena ustawiona jest w trybie konserwacji (test) lub normalnym.
Tryb konserwacji
Syrena uruchomi dwa krótkie sygnaùy beep, a po ok. 10 sek. dùuýszy sygnaù dêwiækowy typu beep.
Teraz naleýy bezpiecznie zdjàã obudowæ syreny ze úciany bez manipulacji przy wyùàczaniu alarmu.
Tryb normalny
Po ok 10 sek. syrena wydaje dùuýszy sygnaù beep, po czym natychmiast rozlegajà siæ 2 krótkie
sygnaùy tego samego typu.
Uwaga! Po wymianie, przeùàczyã do trybu normalnego, naciskajàc przycisk .
TEST DIALERA TELEFONICZNEGO
Nacisnàã , poczym zapala siæ dioda LED strefy 6.
Dialer telefoniczny wywola wszystkie wstæpnie zaprogramowane i aktywne numery telefoniczne.
Jeúli rozmowa jest odebrana, uruchamia siæ nagrany komunikat.
Nacisnàã , aby zatrzymaã test dialera telefonicznego.
USTAWIENIA STANDARDOWE
Kiedy system jest caùkowicie nowy (”prosto z pudeùka”), wszystkie jego funkcje ustawione sà jako
domyúlne (patrz tabela). Moýna to zmieniã zaleýnie od ýyczeñ oraz potrzeb uýytkownika (patrz
karta programowania). Jest to moýliwe dziæki zmienionym okolicznoúciom (np. peùnie zmiany w
modelach) lub zewnætrznym wypadkom, takim jak powaýne zakùócenia zasilania, przez które
system nie jest w stanie prawidùowo funkcjonowaã. Naleýy wykonaã resetowanie systemu w celu
odzyskania ustawieñ domyúlnych. Potem PONOWNIE naleýy wykonaã programowanie.
RESETOWANIE SYSTEMU
Aby zresetowaã system, naleýy dokùadnie przeprowadziã nastæpujàcà proceduræ:
* Sprawdziã, czy palà siæ wyùàcznie diody LED w przedniej czæúci i na panelu kontrolnym.
* Wprowadziã nastæpujàcy kod na urzàdzeniu centralnym:
System jest ustawiony jest w trybie TEST. Uwaga! Jeúli zmieniono kod dostæpowy, naleýy uýyã
zmienionej kombinacji!
1. Odkræciã 2 úruby w górnej czæúci urzàdzenia centralnego (a) (1).
2. Moýna juý wysunàã panel przedni, a praca wewnàtrz staje siæ moýliwa (2).
3. Wyjàã adapter z gniazda úciennego i odùàczyã go (3a).
4. Odùàczyã poùàczenie baterii (3b).
5. ODCZEKAÃ OK. 1 MINUTY.
6. Ustawiã WÙÀCZNIK P1 w pozycji ON.
7. Ponownie podùàczyã bateriæ.
8. System wróci do ustawieñ domyúlnych (zabiera to ok. 20 sek.)
9. Ustawiã wùàcznik P1 z powrotem w pozycji OFF.
10. Ponownie podùàczyã adapter i wùoýyã wtyczkæ do gniazda w úcianie (na krótko zapalà siæ
wszystkie diody LED).
11. Zamknàã panel przedni ponownie dokræciã úruby.
1 2 3 4
1
2
3
4
5
6
5
1 2 3 4
NED
TESTINSTRUCTIES ALARMSYSTEEM HA65S
INSTALLATIETEST
Tijdens het installeren van het systeem zijn de diverse detectoren (SA68P, SA68M) en de
afstands-bediening (SA68R) getest op hun werking en juiste communicatie met de centrale.
3
PERIODIEKE TEST
Buiten de test bij het installeren is het noodzakelijk om periodiek het systeem grondig te testen op
een juiste werking. In de HA68S is hiervoor een speciaal testprogramma aanwezig Diverse
controle procedures en routines testen het systeem helemaal door en signaleren elke onregel-
matigheid of fout. Dit testprogramma is op elk gewenst moment uit te voeren. Wij adviseren om
dit minstens elke 3 maanden één keer te doen en natuurlijk ook na elke verandering in de
installatie. Alle handelingen om de test uit te voeren worden gedaan op het bedieningspaneel van
de centrale. Tip. Doe deze test met 2 personen die met ekaar kunnen communiceren.
INSCHAKELEN TESTSTAND
Om het controleprogramma uit te voeren moet eerst de teststand geactiveerd worden. Controleer
of alleen de power LED's op de voorzijde en bij het bedieningspaneel branden (24uur-stand).
Toets op de centrale de volgende code in:
Het systeem staat nu in de teststand. Let op! Als de toegangscode ooit is gewijzigd, dan de
nieuwe cijfercombinatie gebruiken!
Als alle (of noodzakelijke) tests zijn uitgevoerd, de toets 2x indrukken om terug te
keren naar de 24uur-stand.
HET TESTPROGRAMMA
Controleer de volgende punten
1.Geen beweging in de ruimtes met bewegingsdetector(en) (SA68P)
2.Alle ramen/deuren gesloten zijn met een magneetcontact (SA68M)
3.Alle batterijcompartimenten van alle detectoren moeten gesloten zijn
TEST VAN DE DETECTOREN
Zet het systeem in de teststand. Druk op de LED van zone 1 gaat branden.
Loop door iedere ruimte die beveiligd is met een bewegingsdetector (SA68P). en open ieder raam
en iedere deur die voorzien is van een magneetcontact (SA68M). Bij elke detectie klinkt er een
pieptoon en gaat het ledje van de zone waar de detector aan toegewezen is knipperen. Open
daarna een voor een bij alle detectoren (SA68P en SA68M) het batterijdeksel. Elke keer moeten
alle leds op de centrale branden. De test voor de afstandsbediening (SA68R) gaat als volgt:
Druk op de ARM LED's op de voorzijde en het bedieningspaneel gaan knipperen.
Druk op de PARTARM LED's op de voorzijde en het bedieningspaneel gaan knipperen.
Druk op de POWER LED's op de voorzijde en het bedieningspaneel gaan knipperen.
Shuif de paniekschakelaar aan de zijkant omhoog. Alle zone-LED's gaan knipperen.
Druk op om de detectortest te stoppen.
DOORSCHAKELING TEST
Druk op de LED van zone 2 gaat branden.
De interne doorschakeling voor het aansturen van een flitslicht of sirene wordt ca.5 sec.
geactiveerd.
SIRENE TEST
Druk op de LED van zone 3 gaat branden.
De sirene in de centrale en eventuele externe of draadloze sirenes gaan ca.5 sec. werken.
LED TEST
Druk op de LED van zone 4 gaat branden.
Gebruik hierna de en de toets en kijk of alle ledjes beurtelings gaan branden
Druk op om de led test te stoppen.
ONDERHOUD (TEST) VAN EXTERNE DRAADLOZE SIRENE (INDIEN AANGESLOTEN)
Om dit onderhoud (test) b.v. het wisselen van de batterij te kunnen uitvoeren is het nodig om de
sirene in onderhoud (test) stand te plaatsen. De sirenebehuizing moet hiervoor immers van de
muur worden geschroefd en dat is onder normale omstandigheden een sabotagehandeling.
Druk op Hierdoor wordt de sirene afwisselend in onderhoud(test) stand of normale
stand geplaatst
Onderhoudstand
De sirene geeft 2 korte pieptonen en ± 10 sec. later een lange pieptoon. De sirenebehuizing
kan nu veilig van de muur worden verwijderd zonder sabotagealarmering
Normale stand
De sirene geeft na ± 10 sec. een lange pieptoon onmiddellijk gevolgd door 2 korte piep-
toontjes.
Let op! Na het terugplaatsen de normale stand inschakelen dus op toets drukken.
TELEFOONKIEZERTEST
Druk op de LED van zone 6 gaat branden.
De telefoonkiezer gaat naar alle geactiveerde nummers het geprogrammeerde aantal keren
bellen. Als er wordt opgenomen volgt er een weergave van de opgenomen boodschap.
Druk op om de telefoonkiezer test te stoppen
STANDAARDINSTELLINGEN
Als het systeem helemaal nieuw is ("Uit de doos komt") zijn alle functies en waarden fabrieksmatig
ingesteld (zie tabel). Deze kunnen door de gebruiker naar wens en behoefte gewijzigd worden (zie
de programmeerkaart). Het kan zijn dat door gewijzigde omstandig-heden (bijv. een ingrijpende
verbouwing) of door een calamiteit van buitenaf zoals een ernstige stroomstoring het systeem
dusdanig is ontregeld dat het niet meer correct functioneert. Er moet dan een system reset
uitgevoerd worden die de fabrieksinstellingen weer herstelt. Daarna moet de totale eerder
uitgevoerde programmering OPNIEUW worden uitgevoerd.
SYSTEM RESET
Om het systeem te resetten moet de volgende procedure exact worden:
* Controleer of alleen de power ledjes op de voorzijde en bij het bedieningspaneel branden.
* Toets op de centrale de volgende code in:
Het systeem staat nu in de teststand Let op! Als de toegangscode ooit is gewijzigd, dan de
gewijzigde cijfercombinatie gebruiken!
1. Draai bij de centrale (a) aan de bovenzijde de 2 schroeven los (1).
2. Het frontpaneel kan nu naar voren worden geopend en is het binnenwerk bereikbaar (2).
3. Haal de adapter uit de wandcontactdoos en koppel deze los (3a).
4. Maak de verbinding van de accu los (3b).
5. WACHT ± 1 MINUUT.
6. Zet jumper P1 op ON.
7. Maak de verbinding van de accu weer vast.
8. Het systeem reset zichzelf nu naar alle fabrieksinstellingen (dit duurt ca.20 sec.).
9. Zet jumper P1 terug op OFF.
10. Sluit de adapter weer aan en steek die terug in de wandcontactdoos. (alle LED's gaan
even branden).
11. Sluit het frontpaneel en schroef het weer vast.
uitgevoerd
FABRIEKSTANDAARDEN WIJZIGING d.d.
FUNCTIE WAARDE/INSTELLING NIEUWE INSTELLING
Toegangscode 1 2 3 4
Alarmering Zone 1 vertraagd zone 2-6 direct
Vertragingstijd 30 seconden
Alarmduur 3 minuten
Gedeeltelijk inschakelbaar Zone 1 = UIT Overige = AAN
Sirene doorschakeltijd Gelijk aan alarmduur
Soort van detectie Zone 1 - 4 inbraak
Zoneblokkering AAN
Waarschuwing bij in- en uitgang AAN
Radiostoringbeveiliging AAN
Huiscode draadloze gevelkast 11110000
Gebruik codeslot Zone 1 = UIT zone 2 = UIT
Tijdsduur gesproken boodschappen 70 sec.
Belpogingen 3
Telefoonnummers Geen Zie onder
Alarmboodschappen Geen
Telefoonlijn sabbotagebeveiliging AAN
Vaste verbinding zone 5 UIT
Vaste verbinding zone 6 UIT
Detectie vaste zone 5 Inbraak
Detectie vaste zone 6 Inbraak
Detectie type vaste zone 5 N.C.
Detectie type vaste zone 6 N.C.
GEPROGRAMMEERDE TELEFOONNUMMERS
ZONE 1 - 6 GASZONE ROOKZONE
1 1 1
2 2 2
3 3 3
4 4 4
1 2 3 4
1
2
3
4
5
6
5
1 2 3 4
VALEURS PAR DEFAUT MODIFIE
FONCTION VALEUR/REGLAGE NOUVEAU REGLAGE
Code d’accès 1 2 3 4
Alarme Zone 1 retardée zone 2-6 directe
Durée délai 30 secondes
Durée alarme 3 minutes
Activatoin partielle Zone 1 = OFF Reste = ON
Temps de transfert sirène Egal à la durée de l’alarme
Type de détection Zone 1 - 4 cambriolage
Blocage de zone ON
Avertissement entrée/sortie ON
Protection interférences radio ON
Monture murale code maison sans fil 11110000
CODE D’USAGE Zone 1 = OFF zone 2 = OFF
Durée messages enregistrés 70 sec.
Tentatives d’appels 3
Numéros de téléphone Non Voir ci-dessous
Messages d’alarme Non
Anti-piratage ligne téléphonique ON
Connexion câblée zone 5 OFF
Connexion câblée zone 6 OFF
Détection câblée zone 5 Cambriolage
Détection câblée zone 6 Cambriolage
Type de détection zone câblée 5 N.C
Type de détection zone câblée 6 N.C.
NUMEROS DE TELEPHONES PROGRAMMES
ZONE 1 - 6 ZONE GAZ ZONE FUMEE
1 1 1
2 2 2
3 3 3
4 4 4
CONSIGNES DE TEST DU SYSTÈME D'ALARME HA65S
TEST D'INSTALLATION
Pendant l'installation du système, les différents détecteurs (SA68P, SA68M) et la télécommande
(SA68R) ont été testés pour s'assurer de leur bon fonctionnement et de leur communication correcte
avec l'unité centrale.
TEST PÉRIODIQUE
En plus du test pendant l'installation, il est nécessaire de tester régulièrement le système d'une
façon complète pour s'assurer de son bon fonctionnement. Le HA68S est équipe d'un programme
spécial pour mener cette opération. Plusieurs procédures de contrôle et opérations régulières
effectuent un test complet du système et détectent toute irrégularité ou erreur. Ce programme de
test peut être exécuté à tout moment. Nous conseillons d'effectuer ce test au moins une fois tous
les 3 mois et, bien sûr, après chaque changement apporté à l'installation. Toutes les étapes pour
exécuter le test s'effectuent au panneau de contrôle de l'unité centrale. Conseil : Effectuez ce test
à 2 personnes qui peuvent communiquer l'une avec l'autre.
ACTIVATION DU MODE TEST
Pour exécuter le programme de contrôle, le mode de test doit être préalablement activé. Vérifiez
que seules les LED d'alimentation à l'avant et au panneau de contrôle sont allumées. (mode 24
HOUR).
Saisissez le code suivant sur l'unité centrale :
Le système est maintenant positionné sur le mode TEST. Attention! Si le code d'accès a déjà été
changé, il faut saisir le nouveau code.
Lorsque tous les tests (ou tests nécessaires) ont été effectués, appuyez sur le bouton deux
fois pour retourner au mode 24 HOUR.
PROGRAMME DE TEST
Vérification des points suivants :
1.Pas de mouvement dans les secteurs avec détecteur(s) de mouvement (SA68P).
2.Toutes les fenêtres/portes avec un contact magnétique (SA68M) sont fermées.
3.Toutes les trappes à batteries de tous les détecteurs doivent être fermées.
TEST DES DÉTECTEURS
Positionnez le système sur le mode TEST. Appuyez sur et la LED de la zone 1 s'allumera..
Marchez dans chaque secteur protégé par un détecteur de mouvement (SA68P) et ouvrez chaque
fenêtre et porte équipée d'un contact magnétique (SA68M). Un bip se fera entendre à chaque
détection et la LED de la zone concernée commencera à clignoter. Ouvrez ensuite le couvercle de la
trappe à batteries de tous les détecteurs (SA68P et SA68M) un par un. A chaque fois, toutes les
LED de l'unité centrale devraient s'allumer. Pour tester la télécommande (SA68R) procédez
comme suit :
Appuyez sur et les LED ARM à l'avant et au panneau de contrôle commenceront à
clignoter.
Appuyez sur et les LED PARTARM à l'avant et au panneau de contrôle commenceront à
clignoter.
Appuyez sur et les LED POWER à l'avant et au panneau de contrôle commenceront à
clignoter.
Faites coulisser le bouton panique latéral vers le haut. Toutes les LED de zones commencent à
clignoter.
Appuyez sur pour arrêter le test du détecteur.
TEST DE TRANSFERT
Appuyez sur et la LED de la zone 2 s'allumera.
Le transfert interne pour le contrôle des lumières clignotantes ou de la sirène est activé pendant
environ 5 secondes.
TEST DE LA SIRÈNE
Appuyez sur et la LED de la zone 3 s'allumera.
La sirène dans l'unité centrale et toutes les sirènes externes ou sans fil possibles seront activées
pendant environ 5 secondes.
TEST DES LED
Appuyez sur et la LED de la zone 4 s'allumera.
Utilisez ensuite les boutons et pour voir si toutes les LED s'allument l'une après
l'autre.
Appuyez sur pour arrêter le test des LED.
MAINTENANCE (TEST) DE LA SIRÈNE EXTERNE SANS FIL (SI ELLE EST CONNECTÉE)
Pour effectuer cette maintenance (test), c'est-à-dire changer la batterie, il est nécessaire de
positionner la sirène sur le mode maintenance (test). Après tout, le boîtier de la sirène doit être
retiré du mur, et normalement, il s'agit d'un acte de violation.
Appuyez sur , Ce qui permet de positionner la sirène soit sur le mode maintenance
(test) ou mode normal.
Mode Maintenance
La sirène émet deux bips courts, et après environ 10 secondes un bip plus long. Le boîtier de la
sirène peut maintenant être retiré du mur en toute sécurité sans que l'alarme de violation ne se
déclenche.
Mode normal
Après environ 10 secondes, la sirène émet un long bip, immédiatement suivis de 2 bips courts.
Attention ! Une fois replacée, positionnez la sirène sur mode normal en appuyant sur le bouton
.
TEST DU NUMÉROTEUR TÉLÉPHONIQUE
Appuyez sur et la LED de la zone 6 s'allumera.
Le numéroteur téléphonique composera tous les numéros préprogrammés activés. Si quelqu'un
répond à l'appel, il entendra le message enregistré.
Appuyez sur pour arrêter le test du numéroteur téléphonique.
RÉGLAGES STANDARD
Quand le système est tout neuf (sorti de sa boîte) toutes les fonctions et valeurs sont positionnées
par défaut. (Voir tableau) Ces dernières peuvent être changées par l'utilisateur en fonction de ses
souhaits et besoins (voir carte de programmation) Il est possible qu'en raison de conditions
différentes (une modification majeure) ou une catastrophe externe comme une panne sérieuse
d'alimentation, le système devienne tellement imprécis qu'il ne fonctionne plus correctement.
Une réinitialisation du système doit alors être effectuée pour rétablir ces réglages par défaut.
Ensuite, toute la programmation antérieure doit être effectuée DE NOUVEAU.
RÉINITIALISATION DU SYSTÈME
Pour réinitialiser le système, il faut suivre à la lettre la procédure qui suit :
* Vérifiez que seules les LED d'alimentation à l'avant et au panneau de contrôle sont allumées.
* Saisissez le code suivant sur l'unité centrale :
Le système est maintenant positionné sur le mode TEST. Attention! Si le code d'accès a déjà été
changé, il faut saisir le nouveau code.
1. Dévissez les 2 vis en haut de l'unité centrale (a) (1).
2. Le panneau avant peut maintenant être retiré vers l'avant et le mécanisme interne est
accessible (2).
3. Retirez l'adaptateur de la prise murale et débranchez-le (3a)
4. Débranchez la connexion de la batterie (3b).
5. ATTENDEZ ENVIRON 1 MINUTE.
6. Positionnez le cavalier P1 sur ON.
7. Débranchez la connexion de la batterie.
8. Le système va maintenant se réinitialiser en rétablissant les réglages par défaut (cela prend
environ 20 secondes).
9. Repositionnez le cavalier P1 sur OFF.
10. Reconnectez l'adaptateur et rebranchez-le à la prise murale (toutes les LED s'allumeront
brièvement).
11. Fermez le panneau avant et revissez les vis
1 2 3 4
1
2
3
4
5
6
5
1 2 3 4
VALORES POR DEFECTO CAMBIADO d.d.
FUNCIÓN VALOR/COFIGURACIÓN NUEVA CONFIGURACIÓN
Código de entrada 1 2 3 4
Alarma Zona 1 retrasada Zona 2-6 directa
Tiempo de retraso 30 segundos
Duración de alarma 3 minutos
Activación parcial Zona 1 = OFF Resto = ON
Tiempo de transmisión a sirena Igual que la duración de la alarma
Tipo de detección Zona 1 -4 robo
Bloqueo de zona ON
Advertencia de entrada/salida ON
Protección de radiointerferencias ON
Soporte de pared inalámbrico 11110000
código de casa
Uso de bloqueo codificado Zona 1 = OFF Zona 2 = OFF
Duración de mensajes grabados 70 seg.
Intentos de llamada 3
Números de teléfono Ninguno Ver más abajo
Mensajes de alarma Ninguno
Protección antisabotaje línea ON
telefónica
Conexión cableada zona 5 OFF
Conexión cableada zona 6 OFF
Detección zona cableada 5 Robo
Detección zona cableada 6 Robo
Tipo detección zona cableada 5 N.C.
Tipo detección zona cableada 6 N.C.
NÚMEROS DE TELÉFONO PREPROGRAMADOS
ZONA 1 – 6 ZONA DE GAS ZONA DE HUMO
1 1 1
2 2 2
3 3 3
4 4 4
INSTRUCCIONES DE PRUEBA DEL SISTEMA DE ALARMA HA65S
PRUEBA DE INSTALACIÓN
Durante la instalación del sistema, los diversos detectores (SA68P, SA68M) y el mando a distancia
(SA68R) se han probado para su correcto funcionamiento y comunicación con la centralita.
PRUEBA PERIÓDICA
Aparte de las pruebas durante la instalación, es necesario probar periódicamente el sistema a fondo
para confirmar su correcto funcionamiento. El HA68S tiene un programa especial para hacerlo.
Diversos procedimientos de control y rutinas realizan una prueba completa del sistema y detectan
cualquier irregularidad o error. Este programa de prueba puede activarse en cualquier momento.
Recomendamos realizar esta prueba al menos una vez cada 3 meses, y por supuesto después de
cualquier cambio en la instalación. Todos los pasos para realizar la prueba se realizan en el panel de
control de la centralita. Recomendación: realice esta prueba con 2 personas que puedan comunicarse
entre ellas.
ACTIVACIÓN DEL MODO PRUEBA
Para realizar el programa de control debe activarse primero el modo prueba. Compruebe que sólo se
enciendan los LED de encendido delantero y en el panel de control (modo 24 HOUR).
Introduzca el código siguiente en la unidad central:
El sistema estará ahora en modo TEST. ¡Atención! Si el código de acceso ya se ha cambiado, use
la nueva combinación.
Si se han realizado todas las pruebas (o las necesarias), pulse el botón dos veces para
volver al modo 24 HOUR.
PROGRAMA DE PRUEBA
Compruebe los elementos siguientes:
1.Sin movimiento en las zonas con detector(es) de movimiento (SA68P).
2.Todas las ventanas/puertas con contacto magnético (SA68M) cerradas.
3.Todos los compartimientos de baterías de todos los detectores deben cerrarse.
PROBAR LOS DETECTORES
Ponga el sistema en modo TEST. Pulse . El LED de la zona 1 se encenderá.
Pase por cada zona asegurada con un detector de movimiento (SA68P) y abra cada ventana y
puerta con un contacto magnético (SA68M). Sonará un pitido con cada detección, y el LED de la
zona designada comenzará a parpadear. Abra la tapa del compartimiento de baterías de todos los
detectores (SA68P y SA68M) uno a uno. Cada vez deben encenderse todos los LED de la centralita.
La prueba del mando a distancia (SA68R) es la siguiente:
Pulse , después de lo cual los LED ARM en la parte delantera y el panel de control
comenzarán a parpadear.
Pulse , después de lo cual los LED PARTARM en la parte delantera y el panel de control
comenzarán a parpadear.
Pulse , después de lo cual los LED POWER en la parte delantera y el panel de control
comenzarán a parpadear.
Deslice el botón de pánico lateral hacia arriba. Todos los LED de zona comenzarán a parpadear.
Pulse para detener la prueba del detector.
PRUEBA DE TRANSMISIÓN
Pulse . El LED de la zona 2 se encenderá.
La transmisión interna para controlar una luz estroboscópica o sirena se activa durante aprox. 5
segundos.
PRUEBA DE SIRENA
Pulse . El LED de la zona 3 se encenderá.
La sirena de la centralita y cualquier posible sirena externa o inalámbrica se activarán durante
aprox. 5 seg.
PRUEBA DE LED
Pulse . El LED de la zona 4 se encenderá.
Use el botón y , y compruebe que todos los LED se enciendan, uno a uno.
Pulse para detener la prueba de LED.
MANTENIMIENTO (PRUEBA) DE SIRENA INALÁMBRICA EXTERNA (SI ESTÁ
CONECTADA)
Para realizar este mantenimiento (prueba), por ejemplo, cambiar la batería, es necesario poner la
sirena en modo mantenimiento (prueba). Después de todo, el chasis de la sirena debe sacarse de
la pared, y en circunstancias normales esto es un acto de sabotaje.
Pulse . Establecerá la sirena en modo mantenimiento (prueba) o normal.
Modo mantenimiento
La sirena emite dos pitidos cortos y pasados aprox. 10 seg. un pitido más largo. El chasis de sirena
puede ahora sacarse de la pared con seguridad sin activar una alarma antisabotaje.
Modo normal
Pasados aprox. 10 seg., la sirena emitirá un pitido largo, seguido inmediatamente por 2 pitidos
breves.
¡Atención! Después del cambio, pase a modo normal pulsando el botón .
PRUEBA DE MARCADOR TELEFÓNICO
Pulse . El LED de la zona 6 se encenderá.
El marcador de teléfono llamará a todos los números de teléfono preprogramados activados. Si la
llamada se responde, se reproducirá el mensaje grabado.
Pulse para detener la prueba de marcador telefónico.
CONFIGURACIÓN ESTÁNDAR
Cuando el sistema sea totalmente nuevo (“Salido de la caja") todas las funciones y valores se
ponen por defecto (ver table). Pueden cambiarse según los deseos y necesidades del usuario (ver
tarjeta de programación). Es posible que, debido a circunstancias cambiantes, (por ejemplo,
reformas importantes), o un desastre extremo, como un corte de corriente grave, el sistema se
vuelva tan impredecible que ya no funcione correctamente. En tal caso debe realizarse un reinicio
de sistema para restablecer la configuración por defecto. Luego, debe tener que VOLVER a
realizarse la programación anterior.
REINICIO DE SISTEMA
Para restablecer el sistema, debe seguirse el procedimiento siguiente:
* Compruebe que sólo se enciendan los LED de encendido delantero y en el panel de control.
* Introduzca el código siguiente en la unidad central:
El sistema estará ahora en modo TEST. ¡Atención! Si el código de acceso ya se ha cambiado, use
la nueva combinación.
1. Desatornille los 2 tornillos de la parte superior de la unidad central (a) (1),
2. El panel anterior puede abrirse hacia adelante y acceder al interior (2).
3. Saque el adaptador de la toma de corriente y desconéctelo (3a).
4. Desconecte la conexión de batería (3b).
5. ESPERE APROX. 1 MINUTO.
6. Ponga el conmutador P1 en ON.
7. Vuelva a conectar la batería.
8. El sistema se reiniciará a los valores por defecto (tarda aprox. 20 seg.)
9. Ponga el conmutador P1 de nuevo en OFF.
10. Vuelva a conectar el adatpador y conéctelo a la toma de corriente (se encenderán brevemente
todos los LED).
11. Cierre el panel anterior y apriete los tornillos.
1 2 3 4
1
2
3
4
5
6
5
1 2 3 4
VOREINGESTELLTE WERTE GEÄNDERT auf
FUNKTION WERT/EINSTELLUNG NEUE EINSTELLUNG
Eingangscode 1 2 3 4
Alarm Zone 1 verzögert Zonen 2 - 6 direkt
Verzögerungszeit 30 Sekunden
Alarmdauer 3 Minuten
Teilweise Aktivierung Zone 1 = OFF (AUS) Rest = ON(AN)
Sirenenübertragungszeit Entsprechend der Alarmdauer
Erkennungstyp Zonen 1 – 4 Einbruch
Zonen blockieren ON(AN)
Warnung bei Betreten/Verlassen ON(AN)
Funkinterferenzschutz ON(AN)
Hauscode Funkwandhalterung 11110000
Verwendung Codeschloss Zone 1 = OFF (AUS)
Zone 2 = OFF (AUS)
Dauer der aufgenommenen 70 Sekunden
Nachrichten
Wählversuche 3
Telefonnummern Keine Siehe unten
Alarmnachrichten Keine
Manipulationssicherung der ON(AN)
Telefonleitung
Kabelverbindung Zone 5 OFF (AUS)
Kabelverbindung Zone 6 OFF (AUS)
Erkennung Kabelzone 5 Einbruch
Erkennung Kabelzone 6 Einbruch
Erkennungstyp Kabelzone 5 N.G.
Erkennungstyp Kabelzone 6 N.G.
VORPROGRAMMIERTE TELEFONNUMMERN
ZONEN 1 - 6 GASZONE RAUCHZONE
1 1 1
2 2 2
3 3 3
4 4 4
TESTANWEISUNGEN ALARMSYSTEM HA65S
INSTALLATIONSTEST
Während der Installation des Systems wurden die verschiedenen Detektoren (SA68P, SA68M) und die
Fernbedienung (SA68R) auf ihre Arbeitsweise und die korrekte Kommunikation mit der Zentraleinheit
überprüft.
REGELMÄSSIGER TEST
Neben der Überprüfung während der Installation ist es notwendig, das System regelmäßig auf seine
korrekte Funktion zu testen. Die HA68S ist hierfür mit einem speziellen Programm ausgerüstet.
Verschiedene Kontrollverfahren und Routinen führen eine komplette Überprüfung des Systems durch und
spüren jede Unregelmäßigkeit und jeden Fehler auf. Das Testprogramm kann jederzeit gestartet werden.
Wir empfehlen, diesen Test mindestens alle 3 Monate und natürlich nach jeder Installationsänderung
durchzuführen. Alle Schritte zur Durchführung des Tests werden am Kontrollfelld der Zentraleinheit
durchgeführt. Tipp. Führen Sie den Test mit 2 Personen, die miteinander kommunizieren können, durch.
AKTIVIERUNG DES TESTMODUS
Um das Testprogramm auszuführen, muss zuerst der Testmodus aktiviert werden. Überprüfen Sie, ob nur
die LEDs für die Energieversorgung an der Frontplatte und auf dem Kontrollfeld leuchten (24
HOUR/Stunden-Modus).
Geben Sie nun den folgenden Code in die Zentraleinheit ein:
Das System befindet sich nun im TEST-Modus. Achtung! Wenn der Zugangscode geändert wurde,
verwenden Sie die neue Kombination.
Wenn alle (oder notwendigen) Tests durchgeführt wurden, drücken Sie die Taste 2x , um in den
24 HOUR/Stunden-Modus zurückzukehren.
DAS TESTPROGRAMM
Überprüfen Sie die folgenden Punkte:
1. Keine Bewegung in den Bereichen mit Bewegungsmelder(n) SA68P).
2. Alle Fenster/Türen mit einem Magnetkontakt (SA68M) sind geschlossen.
3. Alle Batteriefächer aller Detektoren müssen geschlossen sein.
TEST DER DETEKTOREN
Schalten Sie das System in den TEST-Modus. Drücken Sie , danach wird die LED der Zone 1
aufleuchten.
Gehen Sie durch jeden Bereich, der mit einem Bewegungsmelder (SA68P) gesichert ist und öffnen Sie
jedes Fenster und jede Tür, die mit einem Magnetkontakt (SA68M) ausgestattet ist. Für jede Erfassung
wird ein Piepton zu hören sein und die LED der entsprechenden Zone beginnt zu blinken. Öffnen Sie
einzeln nacheinander alle Batteriefachabdeckungen aller Detektoren (SA68P und SA68M). Jedes Mal
sollten alle LEDs der Zentraleinheit aufleuchten. Der Test für die Fernbedienung (SA68R) wird wie folgt
durchgeführt:
Drücken Sie , danach beginnen die ARM-LEDs an der Vorderseite und auf dem Kontrollfeld zu
blinken.
Drücken Sie , danach beginnen die PARTARM-LEDs an der Vorderseite und auf dem Kontrollfeld
zu blinken.
Drücken Sie , danach beginnen die POWER-LEDs an der Vorderseite und auf dem Kontrollfeld
zu blinken.
Schieben Sie den Panikknopf an der Seite nach unten. Alle Zonen-LEDs beginnen zu blinken.
Drücken Sie , um den Detektortest zu beenden.
ÜBERTRAGUNGSTEST
Drücken Sie , danach wird die LED der Zone 2 aufleuchten.
Die interne Übertragung für die Kontrolle eines Blinklichtes oder einer Sirene ist für ungefähr 5 Sek.
aktiviert.
SIRENENTEST
Drücken Sie , danach wird die LED der Zone 3 aufleuchten.
Die Sirene in der Zentraleinheit und jede andere mögliche externe oder über Funk verbundene Sirene
wird für ungefähr 5 Sek. aktiviert.
LED-TEST
Drücken Sie , danach wird die LED der Zone 4 aufleuchten.
Verwenden Sie die und die -Taste, und überprüfen Sie, ob alle LEDs nacheinander
leuchten.
Drücken Sie , um den LED-Test zu beenden.
WARTUNG(STEST) DER EXTERNEN FUNKSIRENE (WENN ANGESCHLOSSEN)
Um diese(n) Wartung(stest) durchzuführen, d. h. Batteriewechsel, ist es notwendig, die Sirene in den
Wartung(stest)-Modus zu schalten. Denn nun muss das Sirenengehäuse von der Wand entfernt
werden und das ist unter normalen Umständen ein Manipulationsakt.
Drücken Sie . Das setzt die Sirene entweder in den Wartung(stest)- oder Normal-Modus.
Wartungsmodus
Die Sirene gibt zwei kurze Pieptöne ab und nach ungefähr 10 Sek. ertönt ein langer Piepton. Das
Sirenengehäuse kann jetzt, ohne dass ein Manipulationsalarm ausgelöst wird, sicher von der Wand
genommen werden.
Normalmodus
Nach ungefähr 10 Sek. ertönt ein langer Piepton der Sirene, unmittelbar gefolgt von zwei kurzen
Pieptönen.
Achtung! Schalten Sie nach dem Austausch den Normalmodus an, indem Sie die Taste drücken.
TELEFONWAHLTEST
Drücken Sie , danach wird die LED der Zone 6 aufleuchten.
Der Telefonwähler wird alle aktivierten vorprogrammierten Telefonnummern wählen. Wenn der Anruf
angenommen wurde, wird die aufgenommene Nachricht abgespielt.
Drücken Sie , um den Telefonwahl-Test zu beenden.
STANDARDEINSTELLUNGEN
Wenn das System komplett neu ist („aus dem Karton“), dann sind alle Funktionen und Werte
voreingestellt (siehe Tabelle). Diese können gemäß den Wünschen und Bedürfnissen des Nutzers
geändert werden (siehe die Programmierkarte). Aufgrund veränderter Umstände (d. h. eine
umfangreiche Renovierung) oder einer äußeren Katastrophe, wie schwerwiegender
Energieversorgungsprobleme, kann das System so ungenau werden, dass es nicht mehr richtig
funktioniert. Um die Voreinstellungen wiederherzustellen, muss eine Systemrücksetzung
durchgeführt werden. Dann muss die vorherige Programmierung ERNEUT durchgeführt werden.
SYSTEMRÜCKSETZUNG
Um das System zurückzusetzen, muss das folgende Verfahren ganz genau befolgt werden:
* Überprüfen Sie, ob nur die LEDs für die Energieversorgung an der Frontplatte und auf dem
Kontrollfeld leuchten.
* Geben Sie nun den folgenden Code in die Zentraleinheit ein:
Das System befindet sich nun im TEST-Modus. Achtung! Wenn der Zugangscode jemals geändert
wurde, verwenden Sie die geänderte Kombination.
1. Lösen Sie die 2 Schrauben auf der Oberseite der Zentraleinheit (a) (1).
2. Die Frontplatte kann nun nach vorn geöffnet werden und die Teile im Inneren sind nun zugänglich
(2).
3. Ziehen Sie den Netzadapter aus der Steckdose und trennen Sie ihn (3a).
4. Trennen Sie die Batterieverbindung (3b).
5. WARTEN SIE CA. 1 MINUTE.
6. Setzen Sie den Jumper P1 auf ON.
7. Stellen Sie die Batterieverbindung wieder her.
8. Das System wird nun selbstständig alle Voreinstellungen wiederherstellen (das dauert ca. 20
Sek.).
9. Setzen Sie den Jumper P1 zurück auf OFF.
10. Schließen Sie den Netzadapter wieder an und verbinden Sie ihn mit der Netzsteckdose (alle LEDs
werden kurz aufleuchten).
1 2 3 4
1
2
3
4
5
6
5
1 2 3 4
71 52 43
1817
6
15131110 12 14 16
19 21
20
22
272625
24
363534
33
23
29 32
31
30
28
98
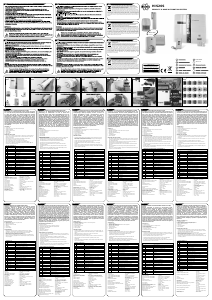
SPECIFICATIONS
General
Frequentie 868 MHz.
Distance about 75m.
Control unit
zones 8
adapter 15V 1,2A DC
batery power 12V battery-pack
700mA
Sabotage protected yes
Alarm output 12V/200mA
batery working time about 48 uur
Remote
batery power 1x CR2032 3V lithium
batery life time about 1 year
PIR Detector
batery power 3,6V Lithium battery
batery life time about 2 year
Detection angle 110°
Detection distance till 10m
Sabotage protected yes
Magnetic detector
batery power 3,6V Lithium battery
batery life time about 2 year
Sabotage proected yes
TESTING INSTRUCTIONS ALARM SYSTEM HA65S
INSTALLATATION TEST
During the installation of the system the different detectors (SA68P, SA68M) and the remote
control (SA68R) have been tested for their operation and correct communication with the
central unit.
PERIODICAL TEST
Besides testing during the installation, it is necessary to periodically test the system
thoroughly for correct functioning. The HA68S is fitted with a special program to do this.
Several control procedures and routines perform a complete test on the system and perceive
every irregularity or error. This testing program can be initiated at any given moment. We
advise to perform this test at least once every 3 months and of course after every change to
the installation. All steps to perform the test are made at the control panel of the central unit.
Tip. Do this test with 2 persons who can communicate with each other.
ACTIVATING TEST MODE
To execute the control program the test mode must be activated first. Check whether only the
power LEDs at the front and at the control panel are lit up (24 HOUR mode).
Enter the following code on the central unit:
The system is now switched to TEST mode. Attention! If the access code has ever been
changed, use the new combination!
If all (or necessary) tests have been performed, press the button 2x to return to the 24
HOUR mode.
THE TEST PROGRAM
Check the following items:
1.No movement in the areas with motion detector(s) (SA68P).
2.All windows/doors with a magnetic contact (SA68M) are closed.
3.All battery compartments of all detectors need to be closed.
TESTING THE DETECTORS
Switch the system to TEST mode. Press after which the LED for zone 1 will light up.
Walk through every area secured with a motion detector (SA68P) and open every window and
door fitted with a magnetic contact (SA68M). A beep will sound at every detection and the LED
of the designated zone will start flashing. Then open the battery compartment cover of all
detectors (SA68P and SA68M) one by one. Each time all LEDs at the central unit should light
up. The test for the remote control (SA68R) is as follows:
Press after which the ARM LEDs at the front and at the control panel will start flashing.
Press after which the PARTARM LEDs at the front and at the control panel will start
flashing.
Press after which the POWER LEDs at the front and at the control panel will start
flashing.
Slide the panic button at the side upwards. All zone LEDs start flashing.
Press to stop the detector test.
TRANSFER TEST
Press after which the LED from zone 2 lights up.
The internal transfer for controlling a flashing light or siren is activated for approx. 5 sec.
SIREN TEST
Press after which the LED from zone 3 lights up.
The siren in the central unit and any possible external or wireless sirens will be activated for
approx. 5 sec.
LED TEST
Press after which the LED for zone 4 lights up.
Then use the and the button and see whether all LEDs burn one by one.
Press to stop the LED test.
MAINTENANCE (TEST) OF EXTERNAL WIRELESS SIREN (IF CONNECTED)
To perform this maintenance (test), i.e. changing the battery, it is necessary to switch the
siren to maintenance (test) mode. After all, the siren casing needs to be removed from the
wall and under normal circumstances this is a tampering act.
Press This sets the siren either to maintenance (test) or normal mode.
Maintenance mode
The siren sounds two short beeps and after approx. 10 sec. a longer beep. The siren casing
can now be safely removed from the wall without a tamper alarm going off.
Normal mode
After approx. 10 sec. the siren sounds a long beep, immediately followed by 2 short beeps.
Attention! After replacement, switch on normal mode by pressing the button.
PHONE DIALER TEST
Press after which the LED for zone 6 will light up.
The phone dialler will call all activated pre-programmed phone numbers. If the call is
answered the recorded message will play.
Press to stop the phone dialler test.
STANDARD SETTINGS
When the system is completely new (”Out of the box”) all functions and values are set to
default (see table). These can be changed according to wishes and needs by the user (see the
programming card). It is possible that due to changed circumstances (i.e. a major
remodelling) or an external calamity like a serious power failure, the system becomes so
inaccurate that it no longer functions properly. A system reset then has to be performed to
restore those default settings. Then the whole previous programming has to be executed
AGAIN.
SYSTEM RESET
In order to reset the system the following procedure has to be followed to the letter:
* Check whether just the power LEDs at the front and at the control panel are burning.
* Enter the following code on the central unit:
The system is now switched to TEST mode. Attention! If the access code has ever been
changed, use the changed combination!
1. Unscrew the 2 screws at the top of the central unit (a) (1).
2. The front panel can now be opened forward and the inner work is accessible (2).
3. Remove the adapter from the wall socket and disconnect it (3a).
4. Disconnect the battery connection (3b).
5. WAIT APPROX. 1 MINUTE.
6. Set jumper P1 to ON.
7. Reconnect the battery connection.
8. The system will now reset itself to all default settings (this takes approx. 20 sec.).
9. Set jumper P1 back to OFF.
10. Reconnect the adapter and plug it back into the wall socket (all LEDs will briefly light up’).
11. Close the front panel and retighten the screws.
1 2 3 4
1
2
3
4
5
6
5
1 2 3 4
DEFAULT VALUES CHANGED d.d.
FUNCTION VALUE/SETTING NEW SETTING
Entrance code 1 2 3 4
Alarm Zone 1 delayed zone 2-6 direct
Delay time 30 seconds
Alarm duration 3 minutes
Partial activation Zone 1 = OFF Rest = ON
Siren transfer time Equal to alarm duration
Detection type Zone 1 - 4 burglary
Zone blocking ON
Warning for entrance/exit ON
Radio interference protection ON
House code wireless wall mount 11110000
Usage code lock Zone 1 = OFF zone 2 = OFF
Duration recorded messages 70 sec.
Call attempts 3
Phone numbers Non See below
Alarm messages Non
Phone line tamper proofing ON
Wired connection zone 5 OFF
Wired connection zone 6 OFF
Detection wired zone 5 Burglary
Detection wired zone 6 Burglary
Detection type wired zone 5 N.C.
Detection type wired zone 6 N.C.
PREPROGRAMMED PHONE NUMBERS
ZONE 1 - 6 GAS ZONE SMOKE ZONE
1 1 1
2 2 2
3 3 3
4 4 4
ÅÃ×ÅÉÑÉÄÉÏ ×ÑÇÓÔÇ
ÁÓÕÑÌÁÔÏ ÓÕÓÔÇÌÁ ÓÕÍÁÃÅÑÌÏÕ 8 ÆÙÍÙÍ
- ÌÏÍÁÄÁ ÅËÅÃ×ÏÕ
- ÁÍÉ×ÍÅÕÔÇÓ ÊÉÍÇÓÇÓ
- 2 x ÌÁÃÍÇÔÉÊÇ ÅÐÁÖÇ
- ÔÇËÅ×ÅÉÑÉÓÔÇÑÉÏ
GR

Λάβετε μέρος στη συζήτηση σχετικά με αυτό το προϊόν
Εδώ μπορείτε να μοιραστείτε τη γνώμη σας για το Elro HA65S Σύστημα συναγερμού. Εάν έχετε κάποια ερώτηση, διαβάστε πρώτα προσεκτικά το εγχειρίδιο. Το να ζητήσετε ένα εγχειρίδιο μπορεί να γίνει χρησιμοποιώντας τη φόρμα επικοινωνίας μας.
απάντηση | Αυτό ήταν χρήσιμο (0) (Μεταφράστηκε από την Google)
απάντηση | Αυτό ήταν χρήσιμο (0) (Μεταφράστηκε από την Google)