Εγχειρίδιο Black and Decker ASL188 Οδηγός τρυπανιών

Χρειάζεστε ένα εγχειρίδιο για το Black and Decker ASL188 Οδηγός τρυπανιών σας; Παρακάτω μπορείτε να δείτε και να κατεβάσετε το εγχειρίδιο PDF δωρεάν στα Αγγλικά. Αυτό το προϊόν έχει αυτήν τη στιγμή 3 συχνές ερωτήσεις, 0 σχόλια και 0 ψήφους. Εάν αυτό δεν είναι το εγχειρίδιο που θέλετε, επικοινωνήστε μαζί μας.

Είναι ελαττωματικό το προϊόν σας και το εγχειρίδιο δεν προσφέρει λύση; Πηγαίνετε σε ένα Repair Café για δωρεάν υπηρεσίες επισκευής.

Εγχειρίδιο

Loading…

6
ENGLISH
(Original instructions)
Fitting and removing a drill bit or screwdriver bit
(g. D)
This tool is tted with a keyless chuck to allow for an easy
exchange of bits.
u Lock the tool by setting the forward/reverse slider (2) to
the centre position.
u Open the chuck by turning it (3) with one hand while
holding the tool with the other.
u Insert the bit shaft (13) into the chuck.
u Firmly tighten the chuck by turning it (3) with one hand
while holding the tool with the other.
Use
Warning! Let the tool work at its own pace. Do not overload.
Charging the battery (g. A)
The battery needs to be charged before rst use and
whenever it fails to produce sufcient power on jobs that were
easily done before. The battery may become warm while
charging; this is normal and does not indicate a problem.
Warning! Do not charge the battery at ambient temperatures
below 4 °C or above 40 °C. Recommended charging
temperature: approx. 24 °C.
Note: The charger will not charge a battery if the cell
temperature is below approximately 0 °C or above 40 °C.
The battery should be left in the charger and the charger
will begin to charge automatically when the cell
temperature warms up or cools down.
u To charge the battery (5), insert it into the charger (9). The
battery will only t into the charger in one way. Do not
force. Be sure that the battery is fully seated in the
charger.
u Plug in the charger and switch on at the mains.
The charging indicator (10) will ash green continuously
(slowly).
The charge is complete when the charging indicator (10) lights
green continuously. The charger and the battery can be left
connected indenitely with the LED illuminated. The LED will
change to ashing green (charging) state as the charger
occasionally tops up the battery charge. The charging
indicator (10) will be lit as long as the battery is connected to
the plugged-in charger.
u Charge discharged batteries within 1 week. Battery life will
be greatly diminished if stored in a discharged state.
Leaving the battery in the charger
The charger and battery pack can be left connected with the
LED glowing indenitely. The charger will keep the battery
pack fresh and fully charged.
Charger diagnostics
If the charger detects a weak or damaged battery, the
charging indicator (10) will ash red at a fast rate. Proceed as
follows:
u Re-insert the battery (5).
u If the charging indicators continues ashing red at a fast
rate, use a different battery to determine if the charging
process works properly.
u If the replaced battery charges correctly, the original
battery is defective and should be returned to a service
centre for recycling.
u If the new battery gives the same indication as the original
battery, take the charger to be tested at an authorised
services centre.
Note: It may take as long as 60 minutes to determine that
the battery is defective. If the battery is too hot or too
cold, the LED will alternately blink red, fast and slow, one
ash at each speed and repeat.
Selecting the direction of rotation (g. F)
For drilling and for tightening screws, use forward (clockwise)
rotation. For loosening screws or removing a jammed drill bit,
use reverse (counterclockwise) rotation.
u To select forward rotation, push the forward/reverse slider
(2) to the left.
u To select reverse rotation, push the forward/reverse slider
to the right.
u To lock the tool, set the forward/reverse slider into the
centre position.
Selecting the torque (g. E)
This tool is tted with a unique collar to set the torque for
various screwdriving and drilling applications. Large screws
and hard workpiece materials require a higher torque setting
than small screws and soft workpiece materials. The collar
has a wide range of settings represented by symbols to suit
your application. For the denition of the symbol refer to the
listing below.
u For drilling in wood, metal and plastics, set the torque
adjustment collar (4) to the symbol corresponding to the
appropriate drilling application.
u For screwdriving, set the collar to the desired setting. If
you do not yet know the appropriate setting, proceed as
follows:
- Set the torque adjustment collar (4) to the lowest torque
setting.
- Tighten the rst screw.
- If the clutch ratchets before the desired result is
achieved, increase the collar setting and continue
tightening the screw. Repeat until you reach the correct
setting. Use this setting for the remaining screws.
Λήψη εγχειριδίου στα ελληνικά (PDF, 8.26 MB)
(Σκεφτείτε το περιβάλλον και εκτυπώστε αυτό το εγχειρίδιο μόνο εάν είναι πραγματικά απαραίτητο)

Loading…

Βαθμολογία

Πείτε μας τη γνώμη σας για το Black and Decker ASL188 Οδηγός τρυπανιών βαθμολογώντας ένα προϊόν. Θέλετε να μοιραστείτε τις εμπειρίες σας με αυτό το προϊόν ή να θέσετε μια ερώτηση; Αφήστε ένα σχόλιο στο κάτω μέρος της σελίδας.
Είστε ικανοποιημένοι με το Black and Decker ASL188 Οδηγός τρυπανιών?
Ναι Όχι
Γίνε ο πρώτος που θα βαθμολογήσει αυτό το προϊόν
0 ψήφοι

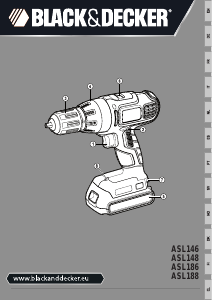
Λάβετε μέρος στη συζήτηση σχετικά με αυτό το προϊόν

Εδώ μπορείτε να μοιραστείτε τη γνώμη σας για το Black and Decker ASL188 Οδηγός τρυπανιών. Εάν έχετε κάποια ερώτηση, διαβάστε πρώτα προσεκτικά το εγχειρίδιο. Το να ζητήσετε ένα εγχειρίδιο μπορεί να γίνει χρησιμοποιώντας τη φόρμα επικοινωνίας μας.

Περισσότερα για αυτό το εγχειρίδιο

Κατανοούμε ότι είναι ωραίο να έχετε ένα χάρτινο εγχειρίδιο για το Black and Decker ASL188 Οδηγός τρυπανιών σας. Μπορείτε πάντα να κατεβάσετε το εγχειρίδιο από τον ιστότοπό μας και να το εκτυπώσετε μόνοι σας. Εάν θέλετε να έχετε ένα πρωτότυπο εγχειρίδιο, σας συνιστούμε να επικοινωνήσετε με το Black and Decker. Μπορεί να είναι σε θέση να παρέχουν ένα πρωτότυπο εγχειρίδιο. Αναζητάτε το εγχειρίδιο του Black and Decker ASL188 Οδηγός τρυπανιών σας σε διαφορετική γλώσσα; Επιλέξτε τη γλώσσα που προτιμάτε στην αρχική μας σελίδα και αναζητήστε τον αριθμό μοντέλου για να δείτε αν τον έχουμε διαθέσιμο.

Προδιαγραφές

Μάρκα Black and Decker
Μοντέλο ASL188
Κατηγορία Οδηγοί τρυπανιών
Τύπος αρχείου PDF
Μέγεθος αρχείου 8.26 MB

Όλα τα εγχειρίδια για Black and Decker Οδηγοί τρυπανιών
Περισσότερα εγχειρίδια του Οδηγοί τρυπανιών

Συχνές ερωτήσεις σχετικά με Black and Decker ASL188 Οδηγός τρυπανιών

Η ομάδα υποστήριξής μας αναζητά χρήσιμες πληροφορίες προϊόντος και απαντήσεις σε συχνές ερωτήσεις. Εάν εντοπίσετε ανακρίβεια στις συνήθεις ερωτήσεις μας, ενημερώστε μας χρησιμοποιώντας τη φόρμα επικοινωνίας.

Συνεχίζω να βγάζω τη βίδα όταν χρησιμοποιώ τον οδηγό τρυπανιού. Γιατί αυτό? Επαληθεύτηκε

Οι περισσότεροι οδηγοί τρυπανιών μπορούν να ρυθμιστούν να βιδώνονται σκληρότερα ή πιο μαλακά. Εάν το κεφάλι συνεχίζει να απογυμνώνεται, ο οδηγός τρυπανιών θα πρέπει πιθανώς να τοποθετηθεί σε διαφορετική ρύθμιση. Όταν πρόκειται για ασύρματη συσκευή, βεβαιωθείτε ότι η μπαταρία έχει φορτιστεί για βέλτιστο αποτέλεσμα.

Αυτό ήταν χρήσιμο (95) Διαβάστε περισσότερα

Πρέπει να φοράω προστασία ακοής όταν χρησιμοποιώ τρυπάνι; Επαληθεύτηκε

Ναι θα έπρεπε. Παρόλο που η ποσότητα του θορύβου που παράγεται από ένα τρυπάνι μπορεί να ποικίλει μεταξύ εμπορικών σημάτων και μοντέλων, η μακροχρόνια έκθεση σε δυνατό θόρυβο μπορεί να προκαλέσει μόνιμη βλάβη στην ακοή. Γι 'αυτό είναι καλή ιδέα να φοράτε προστατευτική ακοή.

Αυτό ήταν χρήσιμο (36) Διαβάστε περισσότερα

Μπορώ να αποθηκεύσω ηλεκτρικά εργαλεία σε υπόστεγο ή γκαράζ; Επαληθεύτηκε

Γενικά, μπορείτε να αποθηκεύσετε ηλεκτρικά εργαλεία σε ένα υπόστεγο ή γκαράζ, ακόμα κι αν μερικές φορές παγώνει εκεί. Ωστόσο, είναι καλύτερο για τη διάρκεια ζωής του ηλεκτρικού εργαλείου να το αποθηκεύετε σε ξηρό μέρος χωρίς μεγάλες διακυμάνσεις θερμοκρασίας. Σε ένα υπόστεγο ή γκαράζ, οι διαφορές στη θερμοκρασία μπορεί να προκαλέσουν τη δημιουργία συμπύκνωσης, η οποία μπορεί να προκαλέσει σκουριά. Επιπλέον, τα εργαλεία που λειτουργούν με μπαταρίες διαρκούν λιγότερο και δεν φορτίζουν το ίδιο καλά σε πολύ χαμηλές θερμοκρασίες. Για να είστε σίγουροι πώς πρέπει να αποθηκεύεται το ηλεκτρικό εργαλείο σας, διαβάζετε πάντα προσεκτικά το εγχειρίδιο χρήσης.

Αυτό ήταν χρήσιμο (28) Διαβάστε περισσότερα
Εγχειρίδιο Black and Decker ASL188 Οδηγός τρυπανιών

Σχετικά προϊόντα

Σχετικές κατηγορίες

×
Download